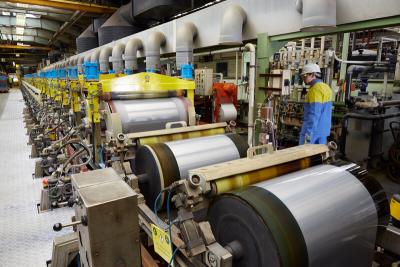
CR: Steel for forming
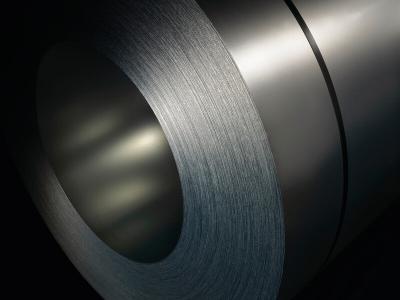
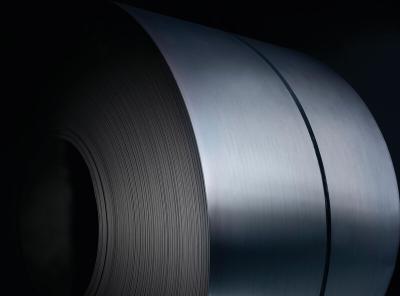
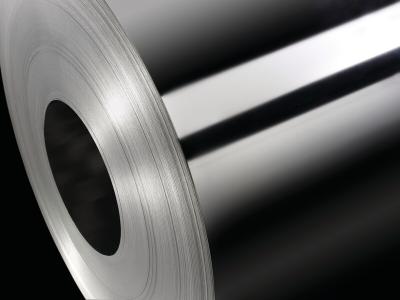
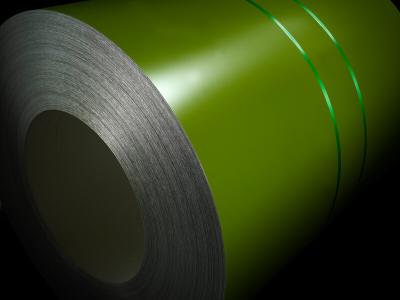
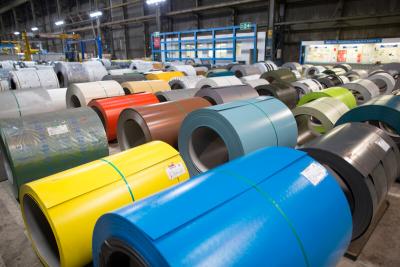
Cold-rolled steel for cold forming and deep drawing is available in a range of grades. Each grade is designed for particular applications – allowing you to pick the best steel for your product.
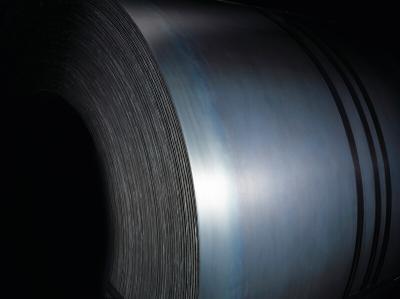
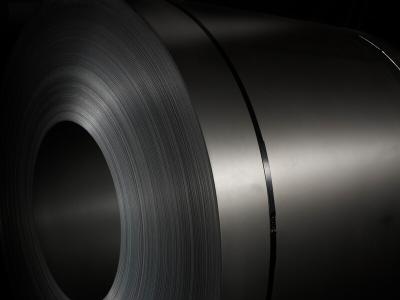
Our forming steel is available in a choice of widths up to 2050 mm and thicknesses up to 3 mm. This provides opportunities for cutting waste and maximising yield. These products is made at Tata Steel Nederland using a batch annealing (BA) process.
EN-Engineering-Product-Cold-rolled-Forming-DC01 TSE
EN-Engineering-Product-Cold-rolled-Forming-All Grades OverviewTSE
Applications
- Automotive components and body panels
- Components for building
- Domestic appliances
- Electrical goods
- Furniture
- Radiators
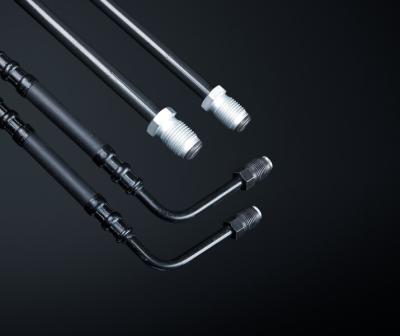
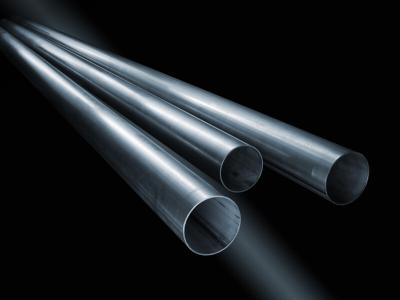
- Tubes
Relationship with standards
Cold-rolled steel for forming complies with European standard EN 10130: 2006 and is available in the grades shown below.
|
European standard |
|---|
|
EN 10130: 2006 |
|
Grade |
|
DC01 |
|
DC03 |
|
DC04 |
|
DC05 |
|
DC06 |
EN-EngineeringAutomotive-Product-Cold-rolled-All Grades Surface aspectsTSE
Surface quality
Surface quality A
Defects that do not influence the formability or the application of surface coatings are permitted. They are defects such as pores, minor scratches, slight indentations, small grooves or slight discolouration.
Surface quality B
The better side must be free of defects that can spoil the uniform appearance of a high-quality paint or of an electrolytic coating. The other side must at least conform to surface quality A. Not all combinations of thickness and width are available in surface quality B. Please contact us for details.
Inspected side
As a rule, the upper side of the strip is inspected; on request, the strip can be wound so that the inspected side is the underside.
Surface texture/roughness
Cold-rolled annealed and skin-passed steel is available in several surface textures. Unless specified otherwise, Tata Steel will supply normal roughness. The table below shows the range of surface textures according to EN 10130:2006.
|
|
Roughness Ra (µm) |
|
|---|---|---|
|
EN 10130: 2006 |
Symbol |
cut off 0.8 mm |
|
extra-bright 1 |
- |
≤ 0.3 |
|
bright |
b |
≤ 0.4 |
|
semi-bright |
g |
≤ 0.9 |
|
normal |
m |
0.6 - 1.9 |
|
rough |
r |
> 1.6 |
|
extra-rough 2 |
- |
3.5 - 5 |
1. Not in EN 10130:2006 - Tata Steel’s own specification. Please contact us regarding the availability
2. Not in EN 10130:2006 - Tata Steel’s own specification, measured with a cut off of 2.5 mm
Other surface textures are available to meet your requirements - please contact us for details.
Preservative oil
The standard oil applied by Tata Steel acts as a protective coating. Other types of oil may be available to meet your requirement.
Tata Steel offers a range of oiling levels from 0.25 - 1.7 g/m2 per side.
Other oiling levels are available on request. Tata Steel is not responsible for the risk of corrosion during storage or shipment if material is ordered in the un-oiled condition.
Surface cleanliness
Tata Steel can guarantee improved surface cleanliness on request for batch-annealed products. The cleanliness is tested with a tape test, in which the loss of reflection is measured. The reflection gives an indication of the oil residue on the annealed product. Two levels of loss of reflectivity are available for batch annealed products: a maximum of 20% or a maximum of 30%.
EN-Engineering-Product-Cold-rolled-Forming-DC01-Properties TSE
Properties
Mechanical properties
Cold-rolled steel for forming has the following mechanical properties (skin-passed) - these are measured transverse to the rolling direction:
| EN 10130: 2006 | Grade | DC01 |
|---|---|---|
| Max. yield strength Re 1,2,6 | N/mm2 | 280 |
| Tensile strength Rm | N/mm2 | 270 - 410 |
| Elongation 3 | % | 28 |
| r90-value 4,5 | - | |
| n90-value 4 | - |
1. The values of the yield strength are those of the 0.2% yield strength for products with no definite yield point and the lower yield strength ReL for the other products.
2. For thicknesses > 0.5 mm and ≤ 0.7 mm, the value for yield strength is increased by 20 N/mm2.
For thicknesses ≤ 0.5 mm, the value is increased by 40 N/mm2.
3. For thicknesses > 0.5 mm and ≤ 0.7 mm the minimum elongation after fracture is decreased by 2%. For thicknesses ≤ 0.5 mm the minimum elongation after fracture is decreased by 4%.
Elongation after fracture A uses test piece length L0 = 80 mm.
4. The r- and n- values apply to a thickness of t ≥ 0.5 mm.
5. For a thickness of t > 2 mm, the r90 value or r-average value is decreased by 0.2.
6. For design purposes, a lower yield strength ReL of at least 140 N/mm2 can be assumed.
Chemical composition
Cold-rolled steel for forming supplied by Tata Steel comply to the following cast analysis:
| EN 10130: 2006 | Grade | DC01 |
|---|---|---|
| C | Max. | 0.12 |
| Mn | Max. | 0.60 |
| P | Max. | 0.045 |
| S | Max. | 0.045 |
All values are in weight%.
EN-Engineering-Product-Cold-rolled-Forming-DC01-Dimensions TSE
Dimensional capability – Batch annealed (BA)
Dimensions in mm.
| Thickness | Max. width |
|---|---|
| From - up to | DC01 |
| 0.35 - 0.37 | 1300 |
| 0.37 - 0.40 | 1630 |
| 0.40 - 0.50 | 1690 |
| 0.50 - 0.70 | 1920 |
| 0.70 - 0.80 | 1970 |
| 0.80 - 1.00 | 2030 |
| 1.00 - 2.40 | 2030 |
| 2.40 - 2.50 | 1960 |
| 2.50 - 2.60 | 1940 |
| 2.60 - 2.70 | 1920 |
| 2.70 - 2.80 | 1850 |
| 2.80 - 2.90 | 1790 |
| 2.90 - 3.00 | 1730 |
The minimum width is 710 mm.
Other dimensions may be available – please contact us.
Tolerances
Tolerances comply with standard EN 10131: 2006.
Tighter tolerances are available, please contact us for details.
EN-EngineeringAutomotive-Product-Cold-rolled-All Grades Shape and Dimensional TolerancesTSE
Tolerances on shape and dimensions comply with standard EN 10131: 2006
Tolerances on thickness
Tolerance (EN 10131: 2006) | Availability |
|---|---|
| Full thickness tolerance | Available |
| Special thickness tolerances | Available |
| 50% of full thickness tolerance | Refer before ordering |
Tolerances closer than special tolerances may be agreed at the time of enquiry.
Tolerances in mm.
Tolerances on thickness for steel grades with a specified minimum yield strength
Re < 260 N/mm2.
Nominal | Normal tolerances for a nominal width of 1 | Special tolerances (S) for a | |||||
|---|---|---|---|---|---|---|---|
| ≤ 1200 | > 1200 | > 1500 | ≤ 1200 | > 1200 | > 1500 | |
| ≤ 1500 |
|
| ≤ 1500 |
| ||
| ≥ 0.35 | ≤ 0.40 | ± 0.03 | ± 0.04 | ± 0.05 | ± 0.020 | ± 0.025 | ± 0.030 |
| > 0.40 | ≤ 0.60 | ± 0.03 | ± 0.04 | ± 0.05 | ± 0.025 | ± 0.030 | ± 0.035 |
| > 0.60 | ≤ 0.80 | ± 0.04 | ± 0.05 | ± 0.06 | ± 0.030 | ± 0.035 | ± 0.040 |
| > 0.80 | ≤ 1.00 | ± 0.05 | ± 0.06 | ± 0.07 | ± 0.035 | ± 0.040 | ± 0.050 |
| > 1.00 | ≤ 1.20 | ± 0.06 | ± 0.07 | ± 0.08 | ± 0.040 | ± 0.050 | ± 0.060 |
| > 1.20 | ≤ 1.60 | ± 0.08 | ± 0.09 | ± 0.10 | ± 0.050 | ± 0.060 | ± 0.070 |
| > 1.60 | ≤ 2.00 | ± 0.10 | ± 0.11 | ± 0.12 | ± 0.060 | ± 0.070 | ± 0.080 |
| > 2.00 | ≤ 2.50 | ± 0.12 | ± 0.13 | ± 0.14 | ± 0.080 | ± 0.090 | ± 0.100 |
| > 2.50 | ≤ 3.00 | ± 0.15 | ± 0.15 | ± 0.16 | ± 0.100 | ± 0.110 | ± 0.120 |
1. Around cold-rolled welds - the pickling welds - an increase of 20% at the most over the thickness
is allowed over a length of 15 metres.
2. For special tolerances, not all combinations of thickness and width are available in every product.
Please contact us for more details.
Tolerances on thickness for steel grades with a specified minimum yield strength
260 N/mm2 ≤ Re < 340 N/mm2.
Nominal | Normal tolerances for a nominal width of 1 | Special tolerances (S) for a | |||||
|---|---|---|---|---|---|---|---|
| ≤ 1200 | > 1200 | > 1500 | ≤ 1200 | > 1200 | > 1500 | |
| ≤ 1500 |
|
| ≤ 1500 |
| ||
| ≥ 0.35 | ≤ 0.40 | ± 0.04 | ± 0.05 | ± 0.06 | ± 0.025 | ± 0.030 | ± 0.035 |
| > 0.40 | ≤ 0.60 | ± 0.04 | ± 0.05 | ± 0.06 | ± 0.030 | ± 0.035 | ± 0.040 |
| > 0.60 | ≤ 0.80 | ± 0.05 | ± 0.06 | ± 0.07 | ± 0.035 | ± 0.040 | ± 0.050 |
| > 0.80 | ≤ 1.00 | ± 0.06 | ± 0.07 | ± 0.08 | ± 0.040 | ± 0.050 | ± 0.060 |
| > 1.00 | ≤ 1.20 | ± 0.07 | ± 0.08 | ± 0.10 | ± 0.050 | ± 0.060 | ± 0.070 |
| > 1.20 | ≤ 1.60 | ± 0.09 | ± 0.11 | ± 0.12 | ± 0.060 | ± 0.070 | ± 0.080 |
| > 1.60 | ≤ 2.00 | ± 0.12 | ± 0.13 | ± 0.14 | ± 0.070 | ± 0.080 | ± 0.100 |
| > 2.00 | ≤ 2.50 | ± 0.14 | ± 0.15 | ± 0.16 | ± 0.100 | ± 0.110 | ± 0.120 |
| > 2.50 | ≤ 3.00 | ± 0.17 | ± 0.18 | ± 0.18 | ± 0.120 | ± 0.130 | ± 0.140 |
1. Around cold-rolled welds - the pickling welds - an increase of 20% at the most over the thickness
is allowed over a length of 15 metres.
2. For special tolerances, not all combinations of thickness and width are available in every product.
Please contact us for more details.
Tolerances on thickness for steel grades with a specified minimum yield strength
340 N/mm2 ≤ Re ≤ 420 N/mm2.
Nominal | Normal tolerances for a nominal width of 1 | Special tolerances (S) for a | |||||
|---|---|---|---|---|---|---|---|
| ≤ 1200 | > 1200 | > 1500 | ≤ 1200 | > 1200 | > 1500 | |
| ≤ 1500 |
|
| ≤ 1500 |
| ||
| ≥ 0.35 | ≤ 0.40 | ± 0.04 | ± 0.05 | ± 0.06 | ± 0.030 | ± 0.035 | ± 0.040 |
| > 0.40 | ≤ 0.60 | ± 0.05 | ± 0.06 | ± 0.07 | ± 0.035 | ± 0.040 | ± 0.050 |
| > 0.60 | ≤ 0.80 | ± 0.06 | ± 0.07 | ± 0.08 | ± 0.040 | ± 0.050 | ± 0.060 |
| > 0.80 | ≤ 1.00 | ± 0.07 | ± 0.08 | ± 0.10 | ± 0.050 | ± 0.060 | ± 0.070 |
| > 1.00 | ≤ 1.20 | ± 0.09 | ± 0.10 | ± 0.11 | ± 0.060 | ± 0.070 | ± 0.080 |
| > 1.20 | ≤ 1.60 | ± 0.11 | ± 0.12 | ± 0.14 | ± 0.070 | ± 0.080 | ± 0.100 |
| > 1.60 | ≤ 2.00 | ± 0.14 | ± 0.15 | ± 0.17 | ± 0.080 | ± 0.100 | ± 0.110 |
| > 2.00 | ≤ 2.50 | ± 0.16 | ± 0.18 | ± 0.19 | ± 0.110 | ± 0.120 | ± 0.130 |
| > 2.50 | ≤ 3.00 | ± 0.20 | ± 0.20 | ± 0.21 | ± 0.130 | ± 0.140 | ± 0.150 |
1. Around cold-rolled welds - the pickling welds - an increase of 20% at the most over the thickness
is allowed over a length of 15 metres.
2. For special tolerances, not all combinations of thickness and width are available in every product.
Please contact us for more details.
Tolerances on thickness for steel grades with a specified minimum yield strength
Re > 420 N/mm2.
Nominal | Normal tolerances for a nominal width of 1 | Special tolerances (S) for a | |||||
|---|---|---|---|---|---|---|---|
| ≤ 1200 | > 1200 | > 1500 | ≤ 1200 | > 1200 | > 1500 | |
| ≤ 1500 |
|
| ≤ 1500 |
| ||
| ≥ 0.35 | ≤ 0.40 | ± 0.05 | ± 0.06 | ± 0.07 | ± 0.035 | ± 0.040 | ± 0.050 |
| > 0.40 | ≤ 0.60 | ± 0.05 | ± 0.07 | ± 0.08 | ± 0.040 | ± 0.050 | ± 0.060 |
| > 0.60 | ≤ 0.80 | ± 0.06 | ± 0.08 | ± 0.10 | ± 0.050 | ± 0.060 | ± 0.070 |
| > 0.80 | ≤ 1.00 | ± 0.08 | ± 0.10 | ± 0.11 | ± 0.060 | ± 0.070 | ± 0.080 |
| > 1.00 | ≤ 1.20 | ± 0.10 | ± 0.11 | ± 0.13 | ± 0.070 | ± 0.080 | ± 0.100 |
| > 1.20 | ≤ 1.60 | ± 0.13 | ± 0.14 | ± 0.16 | ± 0.080 | ± 0.100 | ± 0.110 |
| > 1.60 | ≤ 2.00 | ± 0.16 | ± 0.17 | ± 0.19 | ± 0.100 | ± 0.110 | ± 0.130 |
| > 2.00 | ≤ 2.50 | ± 0.19 | ± 0.20 | ± 0.22 | ± 0.130 | ± 0.140 | ± 0.160 |
| > 2.50 | ≤ 3.00 | ± 0.22 | ± 0.23 | ± 0.24 | ± 0.160 | ± 0.170 | ± 0.180 |
1. Around cold-rolled welds - the pickling welds - an increase of 20% at the most over the thickness
is allowed over a length of 15 metres.
2. For special tolerances, not all combinations of thickness and width are available in every product.
Please contact us for more details.
Tolerances on width
Tolerance | Availability |
|---|---|
| Normal width tolerances | Available |
| Special width tolerances | Refer (± 0.50 mm available on 750 - 2000 mm width) |
Nominal width w | Normal tolerances | Special tolerances (S) | ||
|---|---|---|---|---|
| Under | Over | Under | Over |
| w ≤ 1200 | 0 | 4 | 0 | 2 |
| 1200 < w ≤ 1500 | 0 | 5 | 0 | 2 |
| w > 1500 | 0 | 6 | 0 | 3 |
Out-of-squareness (products supplied as cut sheets only)
The deviation does not exceed 1% of the actual width of the sheet according to the EN 10131: 2006 standard. The deviation from the edge camber does not exceed 5 mm for a length of 2 metres as specified in EN 10131: 2006.
Flatness (products supplied as skin-passed cut sheets only)
Flatness complies with EN 10131: 2006
If there is a dispute about the flatness of material that was ordered to the special tolerances shown in table 8 of EN 10131:2006, then the minimum acceptable standards of flatness described below must be verified.
Criteria in case of disputes over special (FS) flatness tolerances (ReL < 260 N/mm2)
Dimensions in mm.
Nominal width | Edge-wave length | Maximum acceptable wave height |
|---|---|---|
| < 1500 | > 200 | < 1% of edge-wave length |
| ≥ 1500 | > 200 | < 1.5% of edge-wave length |
| – | < 200 | 2 mm |
Winding
For winding, there may be a maximum width gap of 3mm between two consecutive windings. The total width stagger across the coil wall will not exceed 10 mm.
Dimensions and coil weights
Tata Steel can supply cold-rolled steel with the following minimum and maximum dimensions and coil weights.
| Description | Availability |
|---|---|
| Coil diameter inner | 610 mm |
| (508 mm available on request) | |
| Coil diameter outer | 10/7 x width max. |
| 1000 mm min. | |
| 2800 mm max. | |
| Coil weight | 30 t max. |
| 30 - 45 t max. available after consultation | |
| Coil weight limited by maximum outer diameter | |
| Maximum weight allowed by road/rail transport | |
| Some products may have different coil weight ranges available | |
| Usually a minimum coil weight up to 85% of the maximum coil weight can be requested | |
| KIM: width ≤ 1200 mm | 11.9 - 21.5 kg/mm width |
| KIM: 1200mm < width ≤ 1700 mm | 11.9 - 21 kg/mm width |
| KIM: width > 1700 mm | 10.3 kg/mm width and 11.9 - 21 kg/mm width |
| Minimum tonnage per order | Refer to price list for order quantity details |
| Minimum order quantities may apply |
Coil welds
For batch-annealed coils, in general, pickling line welds are included. The number of permissible recoiling line welds is determined in consultation with the customer. If welds are permitted, Tata Steel is better able to implement the best coil weight. A recoiling line weld is marked with a single hole in the centre of the strip, close to the weld. On request the identifying hole can be left out. You can find details on how to get in touch with us in 'Contact Us' below.
EN-EngineeringAutomotive-Product-Cold-rolled-All grades Further processingTSE
Further processing
We have a broad network of Tata Steel service centres across Europe, offering decoiling and slitting services from stock and against short lead times
Light gauge processing
| Processing type | Slitting | Decoiling | Blanking |
|---|---|---|---|
| Thickness range (mm) | 0.2 - 7.0 | 0.3 - 6.0 | 0.3 - 6.0 |
| Width range (mm) | 10 - 2050 | 50 - 2600 | 200 - 2600 |
| Length range | - | up to 6 m | up to 6 m |
| Locations | Netherlands Germany France Spain Sweden Norway Finland |
Netherlands Germany France Spain Sweden Norway Finland |
Netherlands |
For further information please visit our Service Centre webpages.
EN-Engineering-Product-Cold-rolled-Forming-DC03 TSE
EN-Engineering-Product-Cold-rolled-Forming-All Grades OverviewTSE
Applications
- Automotive components and body panels
- Components for building
- Domestic appliances
- Electrical goods
- Furniture
- Radiators
- Tubes
Relationship with standards
Cold-rolled steel for forming complies with European standard EN 10130: 2006 and is available in the grades shown below.
|
European standard |
|---|
|
EN 10130: 2006 |
|
Grade |
|
DC01 |
|
DC03 |
|
DC04 |
|
DC05 |
|
DC06 |
EN-EngineeringAutomotive-Product-Cold-rolled-All Grades Surface aspectsTSE
Surface quality
Surface quality A
Defects that do not influence the formability or the application of surface coatings are permitted. They are defects such as pores, minor scratches, slight indentations, small grooves or slight discolouration.
Surface quality B
The better side must be free of defects that can spoil the uniform appearance of a high-quality paint or of an electrolytic coating. The other side must at least conform to surface quality A. Not all combinations of thickness and width are available in surface quality B. Please contact us for details.
Inspected side
As a rule, the upper side of the strip is inspected; on request, the strip can be wound so that the inspected side is the underside.
Surface texture/roughness
Cold-rolled annealed and skin-passed steel is available in several surface textures. Unless specified otherwise, Tata Steel will supply normal roughness. The table below shows the range of surface textures according to EN 10130:2006.
|
|
Roughness Ra (µm) |
|
|---|---|---|
|
EN 10130: 2006 |
Symbol |
cut off 0.8 mm |
|
extra-bright 1 |
- |
≤ 0.3 |
|
bright |
b |
≤ 0.4 |
|
semi-bright |
g |
≤ 0.9 |
|
normal |
m |
0.6 - 1.9 |
|
rough |
r |
> 1.6 |
|
extra-rough 2 |
- |
3.5 - 5 |
1. Not in EN 10130:2006 - Tata Steel’s own specification. Please contact us regarding the availability
2. Not in EN 10130:2006 - Tata Steel’s own specification, measured with a cut off of 2.5 mm
Other surface textures are available to meet your requirements - please contact us for details.
Preservative oil
The standard oil applied by Tata Steel acts as a protective coating. Other types of oil may be available to meet your requirement.
Tata Steel offers a range of oiling levels from 0.25 - 1.7 g/m2 per side.
Other oiling levels are available on request. Tata Steel is not responsible for the risk of corrosion during storage or shipment if material is ordered in the un-oiled condition.
Surface cleanliness
Tata Steel can guarantee improved surface cleanliness on request for batch-annealed products. The cleanliness is tested with a tape test, in which the loss of reflection is measured. The reflection gives an indication of the oil residue on the annealed product. Two levels of loss of reflectivity are available for batch annealed products: a maximum of 20% or a maximum of 30%.
EN-Engineering-Product-Cold-rolled-Forming-DC03-Properties TSE
Properties
Mechanical properties
Cold-rolled steel for forming has the following mechanical properties (skin-passed) - these are measured transverse to the rolling direction:
| EN 10130: 2006 | Grade | DC03 |
|---|---|---|
| Max. yield strength Re 1,2,6 | N/mm2 | 240 |
| Tensile strength Rm | N/mm2 | 270 - 370 |
| Elongation 3 | % | 34 |
| r90-value 4,5 | 1.30 | |
| n90-value 4 | - |
1. The values of the yield strength are those of the 0.2% yield strength for products with no definite yield point and the lower yield strength ReL for the other products.
2. For thicknesses > 0.5 mm and ≤ 0.7 mm, the value for yield strength is increased by 20 N/mm2.
For thicknesses ≤ 0.5 mm, the value is increased by 40 N/mm2.
3. For thicknesses > 0.5 mm and ≤ 0.7 mm the minimum elongation after fracture is decreased by 2%. For thicknesses ≤ 0.5 mm the minimum elongation after fracture is decreased by 4%.
Elongation after fracture A uses test piece length L0 = 80 mm.
4. The r- and n- values apply to a thickness of t ≥ 0.5 mm.
5. For a thickness of t > 2 mm, the r90 value or r-average value is decreased by 0.2.
6. For design purposes, a lower yield strength ReL of at least 140 N/mm2 can be assumed.
Chemical composition
Cold-rolled steel for forming supplied by Tata Steel comply to the following cast analysis:
| EN 10130: 2006 | Grade | DC03 |
|---|---|---|
| C | Max. | 0.10 |
| Mn | Max. | 0.45 |
| P | Max. | 0.035 |
| S | Max. | 0.035 |
All values are in weight%.
EN-Engineering-Product-Cold-rolled-Forming-DC03-Dimensions TSE
Dimensional capability – Batch annealed (BA)
Dimensions in mm.
| Thickness | Max. width |
|---|---|
| From - up to | DC03 |
| 0.35 - 0.37 | 1300 |
| 0.37 - 0.40 | 1530 |
| 0.40 - 0.50 | 1680 |
| 0.50 - 0.60 | 1750 |
| 0.60 - 0.70 | 1790 |
| 0.70 - 0.80 | 1830 |
| 0.80 - 0.90 | 1880 |
| 0.90 - 1.00 | 1920 |
| 1.00 - 1.10 | 1970 |
| 1.10 - 1.20 | 2020 |
| 1.20 - 1.90 | 2030 |
| 1.90 - 2.00 | 1960 |
| 2.00 - 2.20 | 1840 |
| 2.20 - 2.40 | 1700 |
| 2.40 - 2.60 | 1570 |
| 2.60 - 3.00 | 1500 |
The minimum width is 710 mm.
Other dimensions may be available – please contact us.
Tolerances
Tolerances comply with standard EN 10131: 2006.
Tighter tolerances are available, please contact us for details.
EN-EngineeringAutomotive-Product-Cold-rolled-All Grades Shape and Dimensional TolerancesTSE
Tolerances on shape and dimensions comply with standard EN 10131: 2006
Tolerances on thickness
Tolerance (EN 10131: 2006) | Availability |
|---|---|
| Full thickness tolerance | Available |
| Special thickness tolerances | Available |
| 50% of full thickness tolerance | Refer before ordering |
Tolerances closer than special tolerances may be agreed at the time of enquiry.
Tolerances in mm.
Tolerances on thickness for steel grades with a specified minimum yield strength
Re < 260 N/mm2.
Nominal | Normal tolerances for a nominal width of 1 | Special tolerances (S) for a | |||||
|---|---|---|---|---|---|---|---|
| ≤ 1200 | > 1200 | > 1500 | ≤ 1200 | > 1200 | > 1500 | |
| ≤ 1500 |
|
| ≤ 1500 |
| ||
| ≥ 0.35 | ≤ 0.40 | ± 0.03 | ± 0.04 | ± 0.05 | ± 0.020 | ± 0.025 | ± 0.030 |
| > 0.40 | ≤ 0.60 | ± 0.03 | ± 0.04 | ± 0.05 | ± 0.025 | ± 0.030 | ± 0.035 |
| > 0.60 | ≤ 0.80 | ± 0.04 | ± 0.05 | ± 0.06 | ± 0.030 | ± 0.035 | ± 0.040 |
| > 0.80 | ≤ 1.00 | ± 0.05 | ± 0.06 | ± 0.07 | ± 0.035 | ± 0.040 | ± 0.050 |
| > 1.00 | ≤ 1.20 | ± 0.06 | ± 0.07 | ± 0.08 | ± 0.040 | ± 0.050 | ± 0.060 |
| > 1.20 | ≤ 1.60 | ± 0.08 | ± 0.09 | ± 0.10 | ± 0.050 | ± 0.060 | ± 0.070 |
| > 1.60 | ≤ 2.00 | ± 0.10 | ± 0.11 | ± 0.12 | ± 0.060 | ± 0.070 | ± 0.080 |
| > 2.00 | ≤ 2.50 | ± 0.12 | ± 0.13 | ± 0.14 | ± 0.080 | ± 0.090 | ± 0.100 |
| > 2.50 | ≤ 3.00 | ± 0.15 | ± 0.15 | ± 0.16 | ± 0.100 | ± 0.110 | ± 0.120 |
1. Around cold-rolled welds - the pickling welds - an increase of 20% at the most over the thickness
is allowed over a length of 15 metres.
2. For special tolerances, not all combinations of thickness and width are available in every product.
Please contact us for more details.
Tolerances on thickness for steel grades with a specified minimum yield strength
260 N/mm2 ≤ Re < 340 N/mm2.
Nominal | Normal tolerances for a nominal width of 1 | Special tolerances (S) for a | |||||
|---|---|---|---|---|---|---|---|
| ≤ 1200 | > 1200 | > 1500 | ≤ 1200 | > 1200 | > 1500 | |
| ≤ 1500 |
|
| ≤ 1500 |
| ||
| ≥ 0.35 | ≤ 0.40 | ± 0.04 | ± 0.05 | ± 0.06 | ± 0.025 | ± 0.030 | ± 0.035 |
| > 0.40 | ≤ 0.60 | ± 0.04 | ± 0.05 | ± 0.06 | ± 0.030 | ± 0.035 | ± 0.040 |
| > 0.60 | ≤ 0.80 | ± 0.05 | ± 0.06 | ± 0.07 | ± 0.035 | ± 0.040 | ± 0.050 |
| > 0.80 | ≤ 1.00 | ± 0.06 | ± 0.07 | ± 0.08 | ± 0.040 | ± 0.050 | ± 0.060 |
| > 1.00 | ≤ 1.20 | ± 0.07 | ± 0.08 | ± 0.10 | ± 0.050 | ± 0.060 | ± 0.070 |
| > 1.20 | ≤ 1.60 | ± 0.09 | ± 0.11 | ± 0.12 | ± 0.060 | ± 0.070 | ± 0.080 |
| > 1.60 | ≤ 2.00 | ± 0.12 | ± 0.13 | ± 0.14 | ± 0.070 | ± 0.080 | ± 0.100 |
| > 2.00 | ≤ 2.50 | ± 0.14 | ± 0.15 | ± 0.16 | ± 0.100 | ± 0.110 | ± 0.120 |
| > 2.50 | ≤ 3.00 | ± 0.17 | ± 0.18 | ± 0.18 | ± 0.120 | ± 0.130 | ± 0.140 |
1. Around cold-rolled welds - the pickling welds - an increase of 20% at the most over the thickness
is allowed over a length of 15 metres.
2. For special tolerances, not all combinations of thickness and width are available in every product.
Please contact us for more details.
Tolerances on thickness for steel grades with a specified minimum yield strength
340 N/mm2 ≤ Re ≤ 420 N/mm2.
Nominal | Normal tolerances for a nominal width of 1 | Special tolerances (S) for a | |||||
|---|---|---|---|---|---|---|---|
| ≤ 1200 | > 1200 | > 1500 | ≤ 1200 | > 1200 | > 1500 | |
| ≤ 1500 |
|
| ≤ 1500 |
| ||
| ≥ 0.35 | ≤ 0.40 | ± 0.04 | ± 0.05 | ± 0.06 | ± 0.030 | ± 0.035 | ± 0.040 |
| > 0.40 | ≤ 0.60 | ± 0.05 | ± 0.06 | ± 0.07 | ± 0.035 | ± 0.040 | ± 0.050 |
| > 0.60 | ≤ 0.80 | ± 0.06 | ± 0.07 | ± 0.08 | ± 0.040 | ± 0.050 | ± 0.060 |
| > 0.80 | ≤ 1.00 | ± 0.07 | ± 0.08 | ± 0.10 | ± 0.050 | ± 0.060 | ± 0.070 |
| > 1.00 | ≤ 1.20 | ± 0.09 | ± 0.10 | ± 0.11 | ± 0.060 | ± 0.070 | ± 0.080 |
| > 1.20 | ≤ 1.60 | ± 0.11 | ± 0.12 | ± 0.14 | ± 0.070 | ± 0.080 | ± 0.100 |
| > 1.60 | ≤ 2.00 | ± 0.14 | ± 0.15 | ± 0.17 | ± 0.080 | ± 0.100 | ± 0.110 |
| > 2.00 | ≤ 2.50 | ± 0.16 | ± 0.18 | ± 0.19 | ± 0.110 | ± 0.120 | ± 0.130 |
| > 2.50 | ≤ 3.00 | ± 0.20 | ± 0.20 | ± 0.21 | ± 0.130 | ± 0.140 | ± 0.150 |
1. Around cold-rolled welds - the pickling welds - an increase of 20% at the most over the thickness
is allowed over a length of 15 metres.
2. For special tolerances, not all combinations of thickness and width are available in every product.
Please contact us for more details.
Tolerances on thickness for steel grades with a specified minimum yield strength
Re > 420 N/mm2.
Nominal | Normal tolerances for a nominal width of 1 | Special tolerances (S) for a | |||||
|---|---|---|---|---|---|---|---|
| ≤ 1200 | > 1200 | > 1500 | ≤ 1200 | > 1200 | > 1500 | |
| ≤ 1500 |
|
| ≤ 1500 |
| ||
| ≥ 0.35 | ≤ 0.40 | ± 0.05 | ± 0.06 | ± 0.07 | ± 0.035 | ± 0.040 | ± 0.050 |
| > 0.40 | ≤ 0.60 | ± 0.05 | ± 0.07 | ± 0.08 | ± 0.040 | ± 0.050 | ± 0.060 |
| > 0.60 | ≤ 0.80 | ± 0.06 | ± 0.08 | ± 0.10 | ± 0.050 | ± 0.060 | ± 0.070 |
| > 0.80 | ≤ 1.00 | ± 0.08 | ± 0.10 | ± 0.11 | ± 0.060 | ± 0.070 | ± 0.080 |
| > 1.00 | ≤ 1.20 | ± 0.10 | ± 0.11 | ± 0.13 | ± 0.070 | ± 0.080 | ± 0.100 |
| > 1.20 | ≤ 1.60 | ± 0.13 | ± 0.14 | ± 0.16 | ± 0.080 | ± 0.100 | ± 0.110 |
| > 1.60 | ≤ 2.00 | ± 0.16 | ± 0.17 | ± 0.19 | ± 0.100 | ± 0.110 | ± 0.130 |
| > 2.00 | ≤ 2.50 | ± 0.19 | ± 0.20 | ± 0.22 | ± 0.130 | ± 0.140 | ± 0.160 |
| > 2.50 | ≤ 3.00 | ± 0.22 | ± 0.23 | ± 0.24 | ± 0.160 | ± 0.170 | ± 0.180 |
1. Around cold-rolled welds - the pickling welds - an increase of 20% at the most over the thickness
is allowed over a length of 15 metres.
2. For special tolerances, not all combinations of thickness and width are available in every product.
Please contact us for more details.
Tolerances on width
Tolerance | Availability |
|---|---|
| Normal width tolerances | Available |
| Special width tolerances | Refer (± 0.50 mm available on 750 - 2000 mm width) |
Nominal width w | Normal tolerances | Special tolerances (S) | ||
|---|---|---|---|---|
| Under | Over | Under | Over |
| w ≤ 1200 | 0 | 4 | 0 | 2 |
| 1200 < w ≤ 1500 | 0 | 5 | 0 | 2 |
| w > 1500 | 0 | 6 | 0 | 3 |
Out-of-squareness (products supplied as cut sheets only)
The deviation does not exceed 1% of the actual width of the sheet according to the EN 10131: 2006 standard. The deviation from the edge camber does not exceed 5 mm for a length of 2 metres as specified in EN 10131: 2006.
Flatness (products supplied as skin-passed cut sheets only)
Flatness complies with EN 10131: 2006
If there is a dispute about the flatness of material that was ordered to the special tolerances shown in table 8 of EN 10131:2006, then the minimum acceptable standards of flatness described below must be verified.
Criteria in case of disputes over special (FS) flatness tolerances (ReL < 260 N/mm2)
Dimensions in mm.
Nominal width | Edge-wave length | Maximum acceptable wave height |
|---|---|---|
| < 1500 | > 200 | < 1% of edge-wave length |
| ≥ 1500 | > 200 | < 1.5% of edge-wave length |
| – | < 200 | 2 mm |
Winding
For winding, there may be a maximum width gap of 3mm between two consecutive windings. The total width stagger across the coil wall will not exceed 10 mm.
Dimensions and coil weights
Tata Steel can supply cold-rolled steel with the following minimum and maximum dimensions and coil weights.
| Description | Availability |
|---|---|
| Coil diameter inner | 610 mm |
| (508 mm available on request) | |
| Coil diameter outer | 10/7 x width max. |
| 1000 mm min. | |
| 2800 mm max. | |
| Coil weight | 30 t max. |
| 30 - 45 t max. available after consultation | |
| Coil weight limited by maximum outer diameter | |
| Maximum weight allowed by road/rail transport | |
| Some products may have different coil weight ranges available | |
| Usually a minimum coil weight up to 85% of the maximum coil weight can be requested | |
| KIM: width ≤ 1200 mm | 11.9 - 21.5 kg/mm width |
| KIM: 1200mm < width ≤ 1700 mm | 11.9 - 21 kg/mm width |
| KIM: width > 1700 mm | 10.3 kg/mm width and 11.9 - 21 kg/mm width |
| Minimum tonnage per order | Refer to price list for order quantity details |
| Minimum order quantities may apply |
Coil welds
For batch-annealed coils, in general, pickling line welds are included. The number of permissible recoiling line welds is determined in consultation with the customer. If welds are permitted, Tata Steel is better able to implement the best coil weight. A recoiling line weld is marked with a single hole in the centre of the strip, close to the weld. On request the identifying hole can be left out. You can find details on how to get in touch with us in 'Contact Us' below.
EN-EngineeringAutomotive-Product-Cold-rolled-All grades Further processingTSE
Further processing
We have a broad network of Tata Steel service centres across Europe, offering decoiling and slitting services from stock and against short lead times
Light gauge processing
| Processing type | Slitting | Decoiling | Blanking |
|---|---|---|---|
| Thickness range (mm) | 0.2 - 7.0 | 0.3 - 6.0 | 0.3 - 6.0 |
| Width range (mm) | 10 - 2050 | 50 - 2600 | 200 - 2600 |
| Length range | - | up to 6 m | up to 6 m |
| Locations | Netherlands Germany France Spain Sweden Norway Finland |
Netherlands Germany France Spain Sweden Norway Finland |
Netherlands |
For further information please visit our Service Centre webpages.
EN-Engineering-Product-Cold-rolled-Forming-DC04 TSE
EN-Engineering-Product-Cold-rolled-Forming-All Grades OverviewTSE
Applications
- Automotive components and body panels
- Components for building
- Domestic appliances
- Electrical goods
- Furniture
- Radiators
- Tubes
Relationship with standards
Cold-rolled steel for forming complies with European standard EN 10130: 2006 and is available in the grades shown below.
|
European standard |
|---|
|
EN 10130: 2006 |
|
Grade |
|
DC01 |
|
DC03 |
|
DC04 |
|
DC05 |
|
DC06 |
EN-EngineeringAutomotive-Product-Cold-rolled-All Grades Surface aspectsTSE
Surface quality
Surface quality A
Defects that do not influence the formability or the application of surface coatings are permitted. They are defects such as pores, minor scratches, slight indentations, small grooves or slight discolouration.
Surface quality B
The better side must be free of defects that can spoil the uniform appearance of a high-quality paint or of an electrolytic coating. The other side must at least conform to surface quality A. Not all combinations of thickness and width are available in surface quality B. Please contact us for details.
Inspected side
As a rule, the upper side of the strip is inspected; on request, the strip can be wound so that the inspected side is the underside.
Surface texture/roughness
Cold-rolled annealed and skin-passed steel is available in several surface textures. Unless specified otherwise, Tata Steel will supply normal roughness. The table below shows the range of surface textures according to EN 10130:2006.
|
|
Roughness Ra (µm) |
|
|---|---|---|
|
EN 10130: 2006 |
Symbol |
cut off 0.8 mm |
|
extra-bright 1 |
- |
≤ 0.3 |
|
bright |
b |
≤ 0.4 |
|
semi-bright |
g |
≤ 0.9 |
|
normal |
m |
0.6 - 1.9 |
|
rough |
r |
> 1.6 |
|
extra-rough 2 |
- |
3.5 - 5 |
1. Not in EN 10130:2006 - Tata Steel’s own specification. Please contact us regarding the availability
2. Not in EN 10130:2006 - Tata Steel’s own specification, measured with a cut off of 2.5 mm
Other surface textures are available to meet your requirements - please contact us for details.
Preservative oil
The standard oil applied by Tata Steel acts as a protective coating. Other types of oil may be available to meet your requirement.
Tata Steel offers a range of oiling levels from 0.25 - 1.7 g/m2 per side.
Other oiling levels are available on request. Tata Steel is not responsible for the risk of corrosion during storage or shipment if material is ordered in the un-oiled condition.
Surface cleanliness
Tata Steel can guarantee improved surface cleanliness on request for batch-annealed products. The cleanliness is tested with a tape test, in which the loss of reflection is measured. The reflection gives an indication of the oil residue on the annealed product. Two levels of loss of reflectivity are available for batch annealed products: a maximum of 20% or a maximum of 30%.
EN-Engineering-Product-Cold-rolled-Forming-DC04-Properties TSE
Properties
Mechanical properties
Cold-rolled steel for forming has the following mechanical properties (skin-passed) - these are measured transverse to the rolling direction:
| EN 10130: 2006 | Grade | DC04 |
|---|---|---|
| Max. yield strength Re 1,2,6 | N/mm2 | 210 |
| Tensile strength Rm | N/mm2 | 270 - 350 |
| Elongation 3 | % | 38 |
| r90-value 4,5 | 1.6 | |
| n90-value 4 | 0.18 |
1. The values of the yield strength are those of the 0.2% yield strength for products with no definite yield point and the lower yield strength ReL for the other products.
2. For thicknesses > 0.5 mm and ≤ 0.7 mm, the value for yield strength is increased by 20 N/mm2.
For thicknesses ≤ 0.5 mm, the value is increased by 40 N/mm2.
3. For thicknesses > 0.5 mm and ≤ 0.7 mm the minimum elongation after fracture is decreased by 2%. For thicknesses ≤ 0.5 mm the minimum elongation after fracture is decreased by 4%.
Elongation after fracture A uses test piece length L0 = 80 mm.
4. The r- and n- values apply to a thickness of t ≥ 0.5 mm.
5. For a thickness of t > 2 mm, the r90 value or r-average value is decreased by 0.2.
6. For design purposes, a lower yield strength ReL of at least 140 N/mm2 can be assumed.
Chemical composition
Cold-rolled steel for forming supplied by Tata Steel comply to the following cast analysis:
| EN 10130: 2006 | Grade | DC04 |
|---|---|---|
| C | Max. | 0.08 |
| Mn | Max. | 0.40 |
| P | Max. | 0.030 |
| S | Max. | 0.030 |
All values are in weight%.
EN-Engineering-Product-Cold-rolled-Forming-DC04-Dimensions TSE
Dimensional capability – Batch annealed (BA)
Dimensions in mm.
| Thickness | Max. width |
|---|---|
| From - up to | DC04 |
| 0.35 - 0.37 | 1300 |
| 0.37 - 0.40 | 1530 |
| 0.40 - 0.50 | 1680 |
| 0.50 - 0.60 | 1750 |
| 0.60 - 0.70 | 1790 |
| 0.70 - 0.80 | 1830 |
| 0.80 - 0.90 | 1880 |
| 0.90 - 1.00 | 1920 |
| 1.00 - 1.10 | 1970 |
| 1.10 - 1.20 | 2020 |
| 1.20 - 1.90 | 2030 |
| 1.90 - 2.00 | 1960 |
| 2.00 - 2.20 | 1840 |
| 2.20 - 2.40 | 1700 |
| 2.40 - 2.60 | 1570 |
| 2.60 - 3.00 | 1500 |
The minimum width is 710 mm.
Other dimensions may be available – please contact us.
Tolerances
Tolerances comply with standard EN 10131: 2006.
Tighter tolerances are available, please contact us for details.
EN-EngineeringAutomotive-Product-Cold-rolled-All Grades Shape and Dimensional TolerancesTSE
Tolerances on shape and dimensions comply with standard EN 10131: 2006
Tolerances on thickness
Tolerance (EN 10131: 2006) | Availability |
|---|---|
| Full thickness tolerance | Available |
| Special thickness tolerances | Available |
| 50% of full thickness tolerance | Refer before ordering |
Tolerances closer than special tolerances may be agreed at the time of enquiry.
Tolerances in mm.
Tolerances on thickness for steel grades with a specified minimum yield strength
Re < 260 N/mm2.
Nominal | Normal tolerances for a nominal width of 1 | Special tolerances (S) for a | |||||
|---|---|---|---|---|---|---|---|
| ≤ 1200 | > 1200 | > 1500 | ≤ 1200 | > 1200 | > 1500 | |
| ≤ 1500 |
|
| ≤ 1500 |
| ||
| ≥ 0.35 | ≤ 0.40 | ± 0.03 | ± 0.04 | ± 0.05 | ± 0.020 | ± 0.025 | ± 0.030 |
| > 0.40 | ≤ 0.60 | ± 0.03 | ± 0.04 | ± 0.05 | ± 0.025 | ± 0.030 | ± 0.035 |
| > 0.60 | ≤ 0.80 | ± 0.04 | ± 0.05 | ± 0.06 | ± 0.030 | ± 0.035 | ± 0.040 |
| > 0.80 | ≤ 1.00 | ± 0.05 | ± 0.06 | ± 0.07 | ± 0.035 | ± 0.040 | ± 0.050 |
| > 1.00 | ≤ 1.20 | ± 0.06 | ± 0.07 | ± 0.08 | ± 0.040 | ± 0.050 | ± 0.060 |
| > 1.20 | ≤ 1.60 | ± 0.08 | ± 0.09 | ± 0.10 | ± 0.050 | ± 0.060 | ± 0.070 |
| > 1.60 | ≤ 2.00 | ± 0.10 | ± 0.11 | ± 0.12 | ± 0.060 | ± 0.070 | ± 0.080 |
| > 2.00 | ≤ 2.50 | ± 0.12 | ± 0.13 | ± 0.14 | ± 0.080 | ± 0.090 | ± 0.100 |
| > 2.50 | ≤ 3.00 | ± 0.15 | ± 0.15 | ± 0.16 | ± 0.100 | ± 0.110 | ± 0.120 |
1. Around cold-rolled welds - the pickling welds - an increase of 20% at the most over the thickness
is allowed over a length of 15 metres.
2. For special tolerances, not all combinations of thickness and width are available in every product.
Please contact us for more details.
Tolerances on thickness for steel grades with a specified minimum yield strength
260 N/mm2 ≤ Re < 340 N/mm2.
Nominal | Normal tolerances for a nominal width of 1 | Special tolerances (S) for a | |||||
|---|---|---|---|---|---|---|---|
| ≤ 1200 | > 1200 | > 1500 | ≤ 1200 | > 1200 | > 1500 | |
| ≤ 1500 |
|
| ≤ 1500 |
| ||
| ≥ 0.35 | ≤ 0.40 | ± 0.04 | ± 0.05 | ± 0.06 | ± 0.025 | ± 0.030 | ± 0.035 |
| > 0.40 | ≤ 0.60 | ± 0.04 | ± 0.05 | ± 0.06 | ± 0.030 | ± 0.035 | ± 0.040 |
| > 0.60 | ≤ 0.80 | ± 0.05 | ± 0.06 | ± 0.07 | ± 0.035 | ± 0.040 | ± 0.050 |
| > 0.80 | ≤ 1.00 | ± 0.06 | ± 0.07 | ± 0.08 | ± 0.040 | ± 0.050 | ± 0.060 |
| > 1.00 | ≤ 1.20 | ± 0.07 | ± 0.08 | ± 0.10 | ± 0.050 | ± 0.060 | ± 0.070 |
| > 1.20 | ≤ 1.60 | ± 0.09 | ± 0.11 | ± 0.12 | ± 0.060 | ± 0.070 | ± 0.080 |
| > 1.60 | ≤ 2.00 | ± 0.12 | ± 0.13 | ± 0.14 | ± 0.070 | ± 0.080 | ± 0.100 |
| > 2.00 | ≤ 2.50 | ± 0.14 | ± 0.15 | ± 0.16 | ± 0.100 | ± 0.110 | ± 0.120 |
| > 2.50 | ≤ 3.00 | ± 0.17 | ± 0.18 | ± 0.18 | ± 0.120 | ± 0.130 | ± 0.140 |
1. Around cold-rolled welds - the pickling welds - an increase of 20% at the most over the thickness
is allowed over a length of 15 metres.
2. For special tolerances, not all combinations of thickness and width are available in every product.
Please contact us for more details.
Tolerances on thickness for steel grades with a specified minimum yield strength
340 N/mm2 ≤ Re ≤ 420 N/mm2.
Nominal | Normal tolerances for a nominal width of 1 | Special tolerances (S) for a | |||||
|---|---|---|---|---|---|---|---|
| ≤ 1200 | > 1200 | > 1500 | ≤ 1200 | > 1200 | > 1500 | |
| ≤ 1500 |
|
| ≤ 1500 |
| ||
| ≥ 0.35 | ≤ 0.40 | ± 0.04 | ± 0.05 | ± 0.06 | ± 0.030 | ± 0.035 | ± 0.040 |
| > 0.40 | ≤ 0.60 | ± 0.05 | ± 0.06 | ± 0.07 | ± 0.035 | ± 0.040 | ± 0.050 |
| > 0.60 | ≤ 0.80 | ± 0.06 | ± 0.07 | ± 0.08 | ± 0.040 | ± 0.050 | ± 0.060 |
| > 0.80 | ≤ 1.00 | ± 0.07 | ± 0.08 | ± 0.10 | ± 0.050 | ± 0.060 | ± 0.070 |
| > 1.00 | ≤ 1.20 | ± 0.09 | ± 0.10 | ± 0.11 | ± 0.060 | ± 0.070 | ± 0.080 |
| > 1.20 | ≤ 1.60 | ± 0.11 | ± 0.12 | ± 0.14 | ± 0.070 | ± 0.080 | ± 0.100 |
| > 1.60 | ≤ 2.00 | ± 0.14 | ± 0.15 | ± 0.17 | ± 0.080 | ± 0.100 | ± 0.110 |
| > 2.00 | ≤ 2.50 | ± 0.16 | ± 0.18 | ± 0.19 | ± 0.110 | ± 0.120 | ± 0.130 |
| > 2.50 | ≤ 3.00 | ± 0.20 | ± 0.20 | ± 0.21 | ± 0.130 | ± 0.140 | ± 0.150 |
1. Around cold-rolled welds - the pickling welds - an increase of 20% at the most over the thickness
is allowed over a length of 15 metres.
2. For special tolerances, not all combinations of thickness and width are available in every product.
Please contact us for more details.
Tolerances on thickness for steel grades with a specified minimum yield strength
Re > 420 N/mm2.
Nominal | Normal tolerances for a nominal width of 1 | Special tolerances (S) for a | |||||
|---|---|---|---|---|---|---|---|
| ≤ 1200 | > 1200 | > 1500 | ≤ 1200 | > 1200 | > 1500 | |
| ≤ 1500 |
|
| ≤ 1500 |
| ||
| ≥ 0.35 | ≤ 0.40 | ± 0.05 | ± 0.06 | ± 0.07 | ± 0.035 | ± 0.040 | ± 0.050 |
| > 0.40 | ≤ 0.60 | ± 0.05 | ± 0.07 | ± 0.08 | ± 0.040 | ± 0.050 | ± 0.060 |
| > 0.60 | ≤ 0.80 | ± 0.06 | ± 0.08 | ± 0.10 | ± 0.050 | ± 0.060 | ± 0.070 |
| > 0.80 | ≤ 1.00 | ± 0.08 | ± 0.10 | ± 0.11 | ± 0.060 | ± 0.070 | ± 0.080 |
| > 1.00 | ≤ 1.20 | ± 0.10 | ± 0.11 | ± 0.13 | ± 0.070 | ± 0.080 | ± 0.100 |
| > 1.20 | ≤ 1.60 | ± 0.13 | ± 0.14 | ± 0.16 | ± 0.080 | ± 0.100 | ± 0.110 |
| > 1.60 | ≤ 2.00 | ± 0.16 | ± 0.17 | ± 0.19 | ± 0.100 | ± 0.110 | ± 0.130 |
| > 2.00 | ≤ 2.50 | ± 0.19 | ± 0.20 | ± 0.22 | ± 0.130 | ± 0.140 | ± 0.160 |
| > 2.50 | ≤ 3.00 | ± 0.22 | ± 0.23 | ± 0.24 | ± 0.160 | ± 0.170 | ± 0.180 |
1. Around cold-rolled welds - the pickling welds - an increase of 20% at the most over the thickness
is allowed over a length of 15 metres.
2. For special tolerances, not all combinations of thickness and width are available in every product.
Please contact us for more details.
Tolerances on width
Tolerance | Availability |
|---|---|
| Normal width tolerances | Available |
| Special width tolerances | Refer (± 0.50 mm available on 750 - 2000 mm width) |
Nominal width w | Normal tolerances | Special tolerances (S) | ||
|---|---|---|---|---|
| Under | Over | Under | Over |
| w ≤ 1200 | 0 | 4 | 0 | 2 |
| 1200 < w ≤ 1500 | 0 | 5 | 0 | 2 |
| w > 1500 | 0 | 6 | 0 | 3 |
Out-of-squareness (products supplied as cut sheets only)
The deviation does not exceed 1% of the actual width of the sheet according to the EN 10131: 2006 standard. The deviation from the edge camber does not exceed 5 mm for a length of 2 metres as specified in EN 10131: 2006.
Flatness (products supplied as skin-passed cut sheets only)
Flatness complies with EN 10131: 2006
If there is a dispute about the flatness of material that was ordered to the special tolerances shown in table 8 of EN 10131:2006, then the minimum acceptable standards of flatness described below must be verified.
Criteria in case of disputes over special (FS) flatness tolerances (ReL < 260 N/mm2)
Dimensions in mm.
Nominal width | Edge-wave length | Maximum acceptable wave height |
|---|---|---|
| < 1500 | > 200 | < 1% of edge-wave length |
| ≥ 1500 | > 200 | < 1.5% of edge-wave length |
| – | < 200 | 2 mm |
Winding
For winding, there may be a maximum width gap of 3mm between two consecutive windings. The total width stagger across the coil wall will not exceed 10 mm.
Dimensions and coil weights
Tata Steel can supply cold-rolled steel with the following minimum and maximum dimensions and coil weights.
| Description | Availability |
|---|---|
| Coil diameter inner | 610 mm |
| (508 mm available on request) | |
| Coil diameter outer | 10/7 x width max. |
| 1000 mm min. | |
| 2800 mm max. | |
| Coil weight | 30 t max. |
| 30 - 45 t max. available after consultation | |
| Coil weight limited by maximum outer diameter | |
| Maximum weight allowed by road/rail transport | |
| Some products may have different coil weight ranges available | |
| Usually a minimum coil weight up to 85% of the maximum coil weight can be requested | |
| KIM: width ≤ 1200 mm | 11.9 - 21.5 kg/mm width |
| KIM: 1200mm < width ≤ 1700 mm | 11.9 - 21 kg/mm width |
| KIM: width > 1700 mm | 10.3 kg/mm width and 11.9 - 21 kg/mm width |
| Minimum tonnage per order | Refer to price list for order quantity details |
| Minimum order quantities may apply |
Coil welds
For batch-annealed coils, in general, pickling line welds are included. The number of permissible recoiling line welds is determined in consultation with the customer. If welds are permitted, Tata Steel is better able to implement the best coil weight. A recoiling line weld is marked with a single hole in the centre of the strip, close to the weld. On request the identifying hole can be left out. You can find details on how to get in touch with us in 'Contact Us' below.
EN-EngineeringAutomotive-Product-Cold-rolled-All grades Further processingTSE
Further processing
We have a broad network of Tata Steel service centres across Europe, offering decoiling and slitting services from stock and against short lead times
Light gauge processing
| Processing type | Slitting | Decoiling | Blanking |
|---|---|---|---|
| Thickness range (mm) | 0.2 - 7.0 | 0.3 - 6.0 | 0.3 - 6.0 |
| Width range (mm) | 10 - 2050 | 50 - 2600 | 200 - 2600 |
| Length range | - | up to 6 m | up to 6 m |
| Locations | Netherlands Germany France Spain Sweden Norway Finland |
Netherlands Germany France Spain Sweden Norway Finland |
Netherlands |
For further information please visit our Service Centre webpages.
EN-Engineering-Product-Cold-rolled-Forming-DC05 TSE
EN-Engineering-Product-Cold-rolled-Forming-All Grades OverviewTSE
Applications
- Automotive components and body panels
- Components for building
- Domestic appliances
- Electrical goods
- Furniture
- Radiators
- Tubes
Relationship with standards
Cold-rolled steel for forming complies with European standard EN 10130: 2006 and is available in the grades shown below.
|
European standard |
|---|
|
EN 10130: 2006 |
|
Grade |
|
DC01 |
|
DC03 |
|
DC04 |
|
DC05 |
|
DC06 |
EN-EngineeringAutomotive-Product-Cold-rolled-All Grades Surface aspectsTSE
Surface quality
Surface quality A
Defects that do not influence the formability or the application of surface coatings are permitted. They are defects such as pores, minor scratches, slight indentations, small grooves or slight discolouration.
Surface quality B
The better side must be free of defects that can spoil the uniform appearance of a high-quality paint or of an electrolytic coating. The other side must at least conform to surface quality A. Not all combinations of thickness and width are available in surface quality B. Please contact us for details.
Inspected side
As a rule, the upper side of the strip is inspected; on request, the strip can be wound so that the inspected side is the underside.
Surface texture/roughness
Cold-rolled annealed and skin-passed steel is available in several surface textures. Unless specified otherwise, Tata Steel will supply normal roughness. The table below shows the range of surface textures according to EN 10130:2006.
|
|
Roughness Ra (µm) |
|
|---|---|---|
|
EN 10130: 2006 |
Symbol |
cut off 0.8 mm |
|
extra-bright 1 |
- |
≤ 0.3 |
|
bright |
b |
≤ 0.4 |
|
semi-bright |
g |
≤ 0.9 |
|
normal |
m |
0.6 - 1.9 |
|
rough |
r |
> 1.6 |
|
extra-rough 2 |
- |
3.5 - 5 |
1. Not in EN 10130:2006 - Tata Steel’s own specification. Please contact us regarding the availability
2. Not in EN 10130:2006 - Tata Steel’s own specification, measured with a cut off of 2.5 mm
Other surface textures are available to meet your requirements - please contact us for details.
Preservative oil
The standard oil applied by Tata Steel acts as a protective coating. Other types of oil may be available to meet your requirement.
Tata Steel offers a range of oiling levels from 0.25 - 1.7 g/m2 per side.
Other oiling levels are available on request. Tata Steel is not responsible for the risk of corrosion during storage or shipment if material is ordered in the un-oiled condition.
Surface cleanliness
Tata Steel can guarantee improved surface cleanliness on request for batch-annealed products. The cleanliness is tested with a tape test, in which the loss of reflection is measured. The reflection gives an indication of the oil residue on the annealed product. Two levels of loss of reflectivity are available for batch annealed products: a maximum of 20% or a maximum of 30%.
EN-Engineering-Product-Cold-rolled-Forming-DC05-Properties TSE
Properties
Mechanical properties
Cold-rolled steel for forming has the following mechanical properties (skin-passed) - these are measured transverse to the rolling direction:
| EN 10130: 2006 | Grade | DC05 |
|---|---|---|
| Max. yield strength Re 1,2,6 | N/mm2 | 180 |
| Tensile strength Rm | N/mm2 | 270 - 330 |
| Elongation 3 | % | 40 |
| r90-value 4,5 | 1.90 | |
| n90-value 4 | 0.20 |
1. The values of the yield strength are those of the 0.2% yield strength for products with no definite yield point and the lower yield strength ReL for the other products.
2. For thicknesses > 0.5 mm and ≤ 0.7 mm, the value for yield strength is increased by 20 N/mm2.
For thicknesses ≤ 0.5 mm, the value is increased by 40 N/mm2.
3. For thicknesses > 0.5 mm and ≤ 0.7 mm the minimum elongation after fracture is decreased by 2%. For thicknesses ≤ 0.5 mm the minimum elongation after fracture is decreased by 4%.
Elongation after fracture A uses test piece length L0 = 80 mm.
4. The r- and n- values apply to a thickness of t ≥ 0.5 mm.
5. For a thickness of t > 2 mm, the r90 value or r-average value is decreased by 0.2.
6. For design purposes, a lower yield strength ReL of at least 140 N/mm2 can be assumed.
Chemical composition
Cold-rolled steel for forming supplied by Tata Steel comply to the following cast analysis:
| EN 10130: 2006 | Grade | DC05 |
|---|---|---|
| C | Max. | 0.06 |
| Mn | Max. | 0.35 |
| P | Max. | 0.025 |
| S | Max. | 0.025 |
All values are in weight%.
EN-Engineering-Product-Cold-rolled-Forming-DC05-Dimensions TSE
Dimensional capability – Batch annealed (BA)
Dimensions in mm.
| Thickness | Max. width |
|---|---|
| From - up to | DC05 |
| 0.35 - 0.40 | 1300 |
| 0.40 - 0.50 | 1760 |
| 0.50 - 0.60 | 1840 |
| 0.60 - 0.70 | 1880 |
| 0.70 - 0.80 | 1920 |
| 0.80 - 0.90 | 1970 |
| 0.90 - 1.00 | 2020 |
| 1.00 - 1.30 | 2030 |
| 1.30 - 1.60 | 1880 |
| 1.60 - 1.80 | 1730 |
| 1.80 - 2.00 | 1570 |
| 2.00 - 2.20 | 1430 |
| 2.20 - 2.40 | 1310 |
| 2.40 - 2.50 | 1300 |
The minimum width is 710 mm.
Other dimensions may be available – please contact us.
Tolerances
Tolerances comply with standard EN 10131: 2006.
Tighter tolerances are available, please contact us for details.
EN-EngineeringAutomotive-Product-Cold-rolled-All Grades Shape and Dimensional TolerancesTSE
Tolerances on shape and dimensions comply with standard EN 10131: 2006
Tolerances on thickness
Tolerance (EN 10131: 2006) | Availability |
|---|---|
| Full thickness tolerance | Available |
| Special thickness tolerances | Available |
| 50% of full thickness tolerance | Refer before ordering |
Tolerances closer than special tolerances may be agreed at the time of enquiry.
Tolerances in mm.
Tolerances on thickness for steel grades with a specified minimum yield strength
Re < 260 N/mm2.
Nominal | Normal tolerances for a nominal width of 1 | Special tolerances (S) for a | |||||
|---|---|---|---|---|---|---|---|
| ≤ 1200 | > 1200 | > 1500 | ≤ 1200 | > 1200 | > 1500 | |
| ≤ 1500 |
|
| ≤ 1500 |
| ||
| ≥ 0.35 | ≤ 0.40 | ± 0.03 | ± 0.04 | ± 0.05 | ± 0.020 | ± 0.025 | ± 0.030 |
| > 0.40 | ≤ 0.60 | ± 0.03 | ± 0.04 | ± 0.05 | ± 0.025 | ± 0.030 | ± 0.035 |
| > 0.60 | ≤ 0.80 | ± 0.04 | ± 0.05 | ± 0.06 | ± 0.030 | ± 0.035 | ± 0.040 |
| > 0.80 | ≤ 1.00 | ± 0.05 | ± 0.06 | ± 0.07 | ± 0.035 | ± 0.040 | ± 0.050 |
| > 1.00 | ≤ 1.20 | ± 0.06 | ± 0.07 | ± 0.08 | ± 0.040 | ± 0.050 | ± 0.060 |
| > 1.20 | ≤ 1.60 | ± 0.08 | ± 0.09 | ± 0.10 | ± 0.050 | ± 0.060 | ± 0.070 |
| > 1.60 | ≤ 2.00 | ± 0.10 | ± 0.11 | ± 0.12 | ± 0.060 | ± 0.070 | ± 0.080 |
| > 2.00 | ≤ 2.50 | ± 0.12 | ± 0.13 | ± 0.14 | ± 0.080 | ± 0.090 | ± 0.100 |
| > 2.50 | ≤ 3.00 | ± 0.15 | ± 0.15 | ± 0.16 | ± 0.100 | ± 0.110 | ± 0.120 |
1. Around cold-rolled welds - the pickling welds - an increase of 20% at the most over the thickness
is allowed over a length of 15 metres.
2. For special tolerances, not all combinations of thickness and width are available in every product.
Please contact us for more details.
Tolerances on thickness for steel grades with a specified minimum yield strength
260 N/mm2 ≤ Re < 340 N/mm2.
Nominal | Normal tolerances for a nominal width of 1 | Special tolerances (S) for a | |||||
|---|---|---|---|---|---|---|---|
| ≤ 1200 | > 1200 | > 1500 | ≤ 1200 | > 1200 | > 1500 | |
| ≤ 1500 |
|
| ≤ 1500 |
| ||
| ≥ 0.35 | ≤ 0.40 | ± 0.04 | ± 0.05 | ± 0.06 | ± 0.025 | ± 0.030 | ± 0.035 |
| > 0.40 | ≤ 0.60 | ± 0.04 | ± 0.05 | ± 0.06 | ± 0.030 | ± 0.035 | ± 0.040 |
| > 0.60 | ≤ 0.80 | ± 0.05 | ± 0.06 | ± 0.07 | ± 0.035 | ± 0.040 | ± 0.050 |
| > 0.80 | ≤ 1.00 | ± 0.06 | ± 0.07 | ± 0.08 | ± 0.040 | ± 0.050 | ± 0.060 |
| > 1.00 | ≤ 1.20 | ± 0.07 | ± 0.08 | ± 0.10 | ± 0.050 | ± 0.060 | ± 0.070 |
| > 1.20 | ≤ 1.60 | ± 0.09 | ± 0.11 | ± 0.12 | ± 0.060 | ± 0.070 | ± 0.080 |
| > 1.60 | ≤ 2.00 | ± 0.12 | ± 0.13 | ± 0.14 | ± 0.070 | ± 0.080 | ± 0.100 |
| > 2.00 | ≤ 2.50 | ± 0.14 | ± 0.15 | ± 0.16 | ± 0.100 | ± 0.110 | ± 0.120 |
| > 2.50 | ≤ 3.00 | ± 0.17 | ± 0.18 | ± 0.18 | ± 0.120 | ± 0.130 | ± 0.140 |
1. Around cold-rolled welds - the pickling welds - an increase of 20% at the most over the thickness
is allowed over a length of 15 metres.
2. For special tolerances, not all combinations of thickness and width are available in every product.
Please contact us for more details.
Tolerances on thickness for steel grades with a specified minimum yield strength
340 N/mm2 ≤ Re ≤ 420 N/mm2.
Nominal | Normal tolerances for a nominal width of 1 | Special tolerances (S) for a | |||||
|---|---|---|---|---|---|---|---|
| ≤ 1200 | > 1200 | > 1500 | ≤ 1200 | > 1200 | > 1500 | |
| ≤ 1500 |
|
| ≤ 1500 |
| ||
| ≥ 0.35 | ≤ 0.40 | ± 0.04 | ± 0.05 | ± 0.06 | ± 0.030 | ± 0.035 | ± 0.040 |
| > 0.40 | ≤ 0.60 | ± 0.05 | ± 0.06 | ± 0.07 | ± 0.035 | ± 0.040 | ± 0.050 |
| > 0.60 | ≤ 0.80 | ± 0.06 | ± 0.07 | ± 0.08 | ± 0.040 | ± 0.050 | ± 0.060 |
| > 0.80 | ≤ 1.00 | ± 0.07 | ± 0.08 | ± 0.10 | ± 0.050 | ± 0.060 | ± 0.070 |
| > 1.00 | ≤ 1.20 | ± 0.09 | ± 0.10 | ± 0.11 | ± 0.060 | ± 0.070 | ± 0.080 |
| > 1.20 | ≤ 1.60 | ± 0.11 | ± 0.12 | ± 0.14 | ± 0.070 | ± 0.080 | ± 0.100 |
| > 1.60 | ≤ 2.00 | ± 0.14 | ± 0.15 | ± 0.17 | ± 0.080 | ± 0.100 | ± 0.110 |
| > 2.00 | ≤ 2.50 | ± 0.16 | ± 0.18 | ± 0.19 | ± 0.110 | ± 0.120 | ± 0.130 |
| > 2.50 | ≤ 3.00 | ± 0.20 | ± 0.20 | ± 0.21 | ± 0.130 | ± 0.140 | ± 0.150 |
1. Around cold-rolled welds - the pickling welds - an increase of 20% at the most over the thickness
is allowed over a length of 15 metres.
2. For special tolerances, not all combinations of thickness and width are available in every product.
Please contact us for more details.
Tolerances on thickness for steel grades with a specified minimum yield strength
Re > 420 N/mm2.
Nominal | Normal tolerances for a nominal width of 1 | Special tolerances (S) for a | |||||
|---|---|---|---|---|---|---|---|
| ≤ 1200 | > 1200 | > 1500 | ≤ 1200 | > 1200 | > 1500 | |
| ≤ 1500 |
|
| ≤ 1500 |
| ||
| ≥ 0.35 | ≤ 0.40 | ± 0.05 | ± 0.06 | ± 0.07 | ± 0.035 | ± 0.040 | ± 0.050 |
| > 0.40 | ≤ 0.60 | ± 0.05 | ± 0.07 | ± 0.08 | ± 0.040 | ± 0.050 | ± 0.060 |
| > 0.60 | ≤ 0.80 | ± 0.06 | ± 0.08 | ± 0.10 | ± 0.050 | ± 0.060 | ± 0.070 |
| > 0.80 | ≤ 1.00 | ± 0.08 | ± 0.10 | ± 0.11 | ± 0.060 | ± 0.070 | ± 0.080 |
| > 1.00 | ≤ 1.20 | ± 0.10 | ± 0.11 | ± 0.13 | ± 0.070 | ± 0.080 | ± 0.100 |
| > 1.20 | ≤ 1.60 | ± 0.13 | ± 0.14 | ± 0.16 | ± 0.080 | ± 0.100 | ± 0.110 |
| > 1.60 | ≤ 2.00 | ± 0.16 | ± 0.17 | ± 0.19 | ± 0.100 | ± 0.110 | ± 0.130 |
| > 2.00 | ≤ 2.50 | ± 0.19 | ± 0.20 | ± 0.22 | ± 0.130 | ± 0.140 | ± 0.160 |
| > 2.50 | ≤ 3.00 | ± 0.22 | ± 0.23 | ± 0.24 | ± 0.160 | ± 0.170 | ± 0.180 |
1. Around cold-rolled welds - the pickling welds - an increase of 20% at the most over the thickness
is allowed over a length of 15 metres.
2. For special tolerances, not all combinations of thickness and width are available in every product.
Please contact us for more details.
Tolerances on width
Tolerance | Availability |
|---|---|
| Normal width tolerances | Available |
| Special width tolerances | Refer (± 0.50 mm available on 750 - 2000 mm width) |
Nominal width w | Normal tolerances | Special tolerances (S) | ||
|---|---|---|---|---|
| Under | Over | Under | Over |
| w ≤ 1200 | 0 | 4 | 0 | 2 |
| 1200 < w ≤ 1500 | 0 | 5 | 0 | 2 |
| w > 1500 | 0 | 6 | 0 | 3 |
Out-of-squareness (products supplied as cut sheets only)
The deviation does not exceed 1% of the actual width of the sheet according to the EN 10131: 2006 standard. The deviation from the edge camber does not exceed 5 mm for a length of 2 metres as specified in EN 10131: 2006.
Flatness (products supplied as skin-passed cut sheets only)
Flatness complies with EN 10131: 2006
If there is a dispute about the flatness of material that was ordered to the special tolerances shown in table 8 of EN 10131:2006, then the minimum acceptable standards of flatness described below must be verified.
Criteria in case of disputes over special (FS) flatness tolerances (ReL < 260 N/mm2)
Dimensions in mm.
Nominal width | Edge-wave length | Maximum acceptable wave height |
|---|---|---|
| < 1500 | > 200 | < 1% of edge-wave length |
| ≥ 1500 | > 200 | < 1.5% of edge-wave length |
| – | < 200 | 2 mm |
Winding
For winding, there may be a maximum width gap of 3mm between two consecutive windings. The total width stagger across the coil wall will not exceed 10 mm.
Dimensions and coil weights
Tata Steel can supply cold-rolled steel with the following minimum and maximum dimensions and coil weights.
| Description | Availability |
|---|---|
| Coil diameter inner | 610 mm |
| (508 mm available on request) | |
| Coil diameter outer | 10/7 x width max. |
| 1000 mm min. | |
| 2800 mm max. | |
| Coil weight | 30 t max. |
| 30 - 45 t max. available after consultation | |
| Coil weight limited by maximum outer diameter | |
| Maximum weight allowed by road/rail transport | |
| Some products may have different coil weight ranges available | |
| Usually a minimum coil weight up to 85% of the maximum coil weight can be requested | |
| KIM: width ≤ 1200 mm | 11.9 - 21.5 kg/mm width |
| KIM: 1200mm < width ≤ 1700 mm | 11.9 - 21 kg/mm width |
| KIM: width > 1700 mm | 10.3 kg/mm width and 11.9 - 21 kg/mm width |
| Minimum tonnage per order | Refer to price list for order quantity details |
| Minimum order quantities may apply |
Coil welds
For batch-annealed coils, in general, pickling line welds are included. The number of permissible recoiling line welds is determined in consultation with the customer. If welds are permitted, Tata Steel is better able to implement the best coil weight. A recoiling line weld is marked with a single hole in the centre of the strip, close to the weld. On request the identifying hole can be left out. You can find details on how to get in touch with us in 'Contact Us' below.
EN-EngineeringAutomotive-Product-Cold-rolled-All grades Further processingTSE
Further processing
We have a broad network of Tata Steel service centres across Europe, offering decoiling and slitting services from stock and against short lead times
Light gauge processing
| Processing type | Slitting | Decoiling | Blanking |
|---|---|---|---|
| Thickness range (mm) | 0.2 - 7.0 | 0.3 - 6.0 | 0.3 - 6.0 |
| Width range (mm) | 10 - 2050 | 50 - 2600 | 200 - 2600 |
| Length range | - | up to 6 m | up to 6 m |
| Locations | Netherlands Germany France Spain Sweden Norway Finland |
Netherlands Germany France Spain Sweden Norway Finland |
Netherlands |
For further information please visit our Service Centre webpages.
EN-Engineering-Product-Cold-rolled-Forming-DC06 TSE
EN-Engineering-Product-Cold-rolled-Forming-All Grades OverviewTSE
Applications
- Automotive components and body panels
- Components for building
- Domestic appliances
- Electrical goods
- Furniture
- Radiators
- Tubes
Relationship with standards
Cold-rolled steel for forming complies with European standard EN 10130: 2006 and is available in the grades shown below.
|
European standard |
|---|
|
EN 10130: 2006 |
|
Grade |
|
DC01 |
|
DC03 |
|
DC04 |
|
DC05 |
|
DC06 |
EN-EngineeringAutomotive-Product-Cold-rolled-All Grades Surface aspectsTSE
Surface quality
Surface quality A
Defects that do not influence the formability or the application of surface coatings are permitted. They are defects such as pores, minor scratches, slight indentations, small grooves or slight discolouration.
Surface quality B
The better side must be free of defects that can spoil the uniform appearance of a high-quality paint or of an electrolytic coating. The other side must at least conform to surface quality A. Not all combinations of thickness and width are available in surface quality B. Please contact us for details.
Inspected side
As a rule, the upper side of the strip is inspected; on request, the strip can be wound so that the inspected side is the underside.
Surface texture/roughness
Cold-rolled annealed and skin-passed steel is available in several surface textures. Unless specified otherwise, Tata Steel will supply normal roughness. The table below shows the range of surface textures according to EN 10130:2006.
|
|
Roughness Ra (µm) |
|
|---|---|---|
|
EN 10130: 2006 |
Symbol |
cut off 0.8 mm |
|
extra-bright 1 |
- |
≤ 0.3 |
|
bright |
b |
≤ 0.4 |
|
semi-bright |
g |
≤ 0.9 |
|
normal |
m |
0.6 - 1.9 |
|
rough |
r |
> 1.6 |
|
extra-rough 2 |
- |
3.5 - 5 |
1. Not in EN 10130:2006 - Tata Steel’s own specification. Please contact us regarding the availability
2. Not in EN 10130:2006 - Tata Steel’s own specification, measured with a cut off of 2.5 mm
Other surface textures are available to meet your requirements - please contact us for details.
Preservative oil
The standard oil applied by Tata Steel acts as a protective coating. Other types of oil may be available to meet your requirement.
Tata Steel offers a range of oiling levels from 0.25 - 1.7 g/m2 per side.
Other oiling levels are available on request. Tata Steel is not responsible for the risk of corrosion during storage or shipment if material is ordered in the un-oiled condition.
Surface cleanliness
Tata Steel can guarantee improved surface cleanliness on request for batch-annealed products. The cleanliness is tested with a tape test, in which the loss of reflection is measured. The reflection gives an indication of the oil residue on the annealed product. Two levels of loss of reflectivity are available for batch annealed products: a maximum of 20% or a maximum of 30%.
EN-Engineering-Product-Cold-rolled-Forming-DC06-Properties TSE
Properties
Mechanical properties
Cold-rolled steel for forming has the following mechanical properties (skin-passed) - these are measured transverse to the rolling direction:
| EN 10130: 2006 | Grade | DC06 |
|---|---|---|
| Max. yield strength Re 1,2,6 | N/mm2 | 170 |
| Tensile strength Rm | N/mm2 | 270 - 330 |
| Elongation 3 | % | 41 |
| r90-value 4,5 | 2.10 | |
| n90-value 4 | 0.22 |
1. The values of the yield strength are those of the 0.2% yield strength for products with no definite yield point and the lower yield strength ReL for the other products.
2. For thicknesses > 0.5 mm and ≤ 0.7 mm, the value for yield strength is increased by 20 N/mm2.
For thicknesses ≤ 0.5 mm, the value is increased by 40 N/mm2.
3. For thicknesses > 0.5 mm and ≤ 0.7 mm the minimum elongation after fracture is decreased by 2%. For thicknesses ≤ 0.5 mm the minimum elongation after fracture is decreased by 4%.
Elongation after fracture A uses test piece length L0 = 80 mm.
4. The r- and n- values apply to a thickness of t ≥ 0.5 mm.
5. For a thickness of t > 2 mm, the r90 value or r-average value is decreased by 0.2.
6. For design purposes, a lower yield strength ReL of at least 120 N/mm2 can be assumed.
Chemical composition
Cold-rolled steel for forming supplied by Tata Steel comply to the following cast analysis:
| EN 10130: 2006 | Grade | DC06 |
|---|---|---|
| C | Max. | 0.02 |
| Mn | Max. | 0.25 |
| P | Max. | 0.02 |
| S | Max. | 0.02 |
| Ti 1 | Max. | 0.30 |
1. Titanium may be replaced by niobium. Carbon and nitrogen will be completely bound.
All values are in weight%.
EN-Engineering-Product-Cold-rolled-Forming-DC06-Dimensions TSE
Dimensional capability – Batch annealed (BA)
Dimensions in mm.
| Thickness | Max. width |
|---|---|
| From - up to | DC06 |
| 0.50 - 0.60 | 1900 |
| 0.60 - 0.70 | 2010 |
| 0.70 - 1.50 | 2030 |
| 1.50 - 1.60 | 1920 |
| 1.60 - 1.70 | 1800 |
| 1.70 - 1.80 | 1720 |
| 1.80 - 1.90 | 1600 |
| 1.90 - 2.00 | 1550 |
| 2.00 - 2.10 | 1490 |
| 2.10 - 2.20 | 1420 |
The minimum width is 710 mm.
Other dimensions may be available – please contact us.
Tolerances
Tolerances comply with standard EN 10131: 2006.
Tighter tolerances are available, please contact us for details.
EN-EngineeringAutomotive-Product-Cold-rolled-All Grades Shape and Dimensional TolerancesTSE
Tolerances on shape and dimensions comply with standard EN 10131: 2006
Tolerances on thickness
Tolerance (EN 10131: 2006) | Availability |
|---|---|
| Full thickness tolerance | Available |
| Special thickness tolerances | Available |
| 50% of full thickness tolerance | Refer before ordering |
Tolerances closer than special tolerances may be agreed at the time of enquiry.
Tolerances in mm.
Tolerances on thickness for steel grades with a specified minimum yield strength
Re < 260 N/mm2.
Nominal | Normal tolerances for a nominal width of 1 | Special tolerances (S) for a | |||||
|---|---|---|---|---|---|---|---|
| ≤ 1200 | > 1200 | > 1500 | ≤ 1200 | > 1200 | > 1500 | |
| ≤ 1500 |
|
| ≤ 1500 |
| ||
| ≥ 0.35 | ≤ 0.40 | ± 0.03 | ± 0.04 | ± 0.05 | ± 0.020 | ± 0.025 | ± 0.030 |
| > 0.40 | ≤ 0.60 | ± 0.03 | ± 0.04 | ± 0.05 | ± 0.025 | ± 0.030 | ± 0.035 |
| > 0.60 | ≤ 0.80 | ± 0.04 | ± 0.05 | ± 0.06 | ± 0.030 | ± 0.035 | ± 0.040 |
| > 0.80 | ≤ 1.00 | ± 0.05 | ± 0.06 | ± 0.07 | ± 0.035 | ± 0.040 | ± 0.050 |
| > 1.00 | ≤ 1.20 | ± 0.06 | ± 0.07 | ± 0.08 | ± 0.040 | ± 0.050 | ± 0.060 |
| > 1.20 | ≤ 1.60 | ± 0.08 | ± 0.09 | ± 0.10 | ± 0.050 | ± 0.060 | ± 0.070 |
| > 1.60 | ≤ 2.00 | ± 0.10 | ± 0.11 | ± 0.12 | ± 0.060 | ± 0.070 | ± 0.080 |
| > 2.00 | ≤ 2.50 | ± 0.12 | ± 0.13 | ± 0.14 | ± 0.080 | ± 0.090 | ± 0.100 |
| > 2.50 | ≤ 3.00 | ± 0.15 | ± 0.15 | ± 0.16 | ± 0.100 | ± 0.110 | ± 0.120 |
1. Around cold-rolled welds - the pickling welds - an increase of 20% at the most over the thickness
is allowed over a length of 15 metres.
2. For special tolerances, not all combinations of thickness and width are available in every product.
Please contact us for more details.
Tolerances on thickness for steel grades with a specified minimum yield strength
260 N/mm2 ≤ Re < 340 N/mm2.
Nominal | Normal tolerances for a nominal width of 1 | Special tolerances (S) for a | |||||
|---|---|---|---|---|---|---|---|
| ≤ 1200 | > 1200 | > 1500 | ≤ 1200 | > 1200 | > 1500 | |
| ≤ 1500 |
|
| ≤ 1500 |
| ||
| ≥ 0.35 | ≤ 0.40 | ± 0.04 | ± 0.05 | ± 0.06 | ± 0.025 | ± 0.030 | ± 0.035 |
| > 0.40 | ≤ 0.60 | ± 0.04 | ± 0.05 | ± 0.06 | ± 0.030 | ± 0.035 | ± 0.040 |
| > 0.60 | ≤ 0.80 | ± 0.05 | ± 0.06 | ± 0.07 | ± 0.035 | ± 0.040 | ± 0.050 |
| > 0.80 | ≤ 1.00 | ± 0.06 | ± 0.07 | ± 0.08 | ± 0.040 | ± 0.050 | ± 0.060 |
| > 1.00 | ≤ 1.20 | ± 0.07 | ± 0.08 | ± 0.10 | ± 0.050 | ± 0.060 | ± 0.070 |
| > 1.20 | ≤ 1.60 | ± 0.09 | ± 0.11 | ± 0.12 | ± 0.060 | ± 0.070 | ± 0.080 |
| > 1.60 | ≤ 2.00 | ± 0.12 | ± 0.13 | ± 0.14 | ± 0.070 | ± 0.080 | ± 0.100 |
| > 2.00 | ≤ 2.50 | ± 0.14 | ± 0.15 | ± 0.16 | ± 0.100 | ± 0.110 | ± 0.120 |
| > 2.50 | ≤ 3.00 | ± 0.17 | ± 0.18 | ± 0.18 | ± 0.120 | ± 0.130 | ± 0.140 |
1. Around cold-rolled welds - the pickling welds - an increase of 20% at the most over the thickness
is allowed over a length of 15 metres.
2. For special tolerances, not all combinations of thickness and width are available in every product.
Please contact us for more details.
Tolerances on thickness for steel grades with a specified minimum yield strength
340 N/mm2 ≤ Re ≤ 420 N/mm2.
Nominal | Normal tolerances for a nominal width of 1 | Special tolerances (S) for a | |||||
|---|---|---|---|---|---|---|---|
| ≤ 1200 | > 1200 | > 1500 | ≤ 1200 | > 1200 | > 1500 | |
| ≤ 1500 |
|
| ≤ 1500 |
| ||
| ≥ 0.35 | ≤ 0.40 | ± 0.04 | ± 0.05 | ± 0.06 | ± 0.030 | ± 0.035 | ± 0.040 |
| > 0.40 | ≤ 0.60 | ± 0.05 | ± 0.06 | ± 0.07 | ± 0.035 | ± 0.040 | ± 0.050 |
| > 0.60 | ≤ 0.80 | ± 0.06 | ± 0.07 | ± 0.08 | ± 0.040 | ± 0.050 | ± 0.060 |
| > 0.80 | ≤ 1.00 | ± 0.07 | ± 0.08 | ± 0.10 | ± 0.050 | ± 0.060 | ± 0.070 |
| > 1.00 | ≤ 1.20 | ± 0.09 | ± 0.10 | ± 0.11 | ± 0.060 | ± 0.070 | ± 0.080 |
| > 1.20 | ≤ 1.60 | ± 0.11 | ± 0.12 | ± 0.14 | ± 0.070 | ± 0.080 | ± 0.100 |
| > 1.60 | ≤ 2.00 | ± 0.14 | ± 0.15 | ± 0.17 | ± 0.080 | ± 0.100 | ± 0.110 |
| > 2.00 | ≤ 2.50 | ± 0.16 | ± 0.18 | ± 0.19 | ± 0.110 | ± 0.120 | ± 0.130 |
| > 2.50 | ≤ 3.00 | ± 0.20 | ± 0.20 | ± 0.21 | ± 0.130 | ± 0.140 | ± 0.150 |
1. Around cold-rolled welds - the pickling welds - an increase of 20% at the most over the thickness
is allowed over a length of 15 metres.
2. For special tolerances, not all combinations of thickness and width are available in every product.
Please contact us for more details.
Tolerances on thickness for steel grades with a specified minimum yield strength
Re > 420 N/mm2.
Nominal | Normal tolerances for a nominal width of 1 | Special tolerances (S) for a | |||||
|---|---|---|---|---|---|---|---|
| ≤ 1200 | > 1200 | > 1500 | ≤ 1200 | > 1200 | > 1500 | |
| ≤ 1500 |
|
| ≤ 1500 |
| ||
| ≥ 0.35 | ≤ 0.40 | ± 0.05 | ± 0.06 | ± 0.07 | ± 0.035 | ± 0.040 | ± 0.050 |
| > 0.40 | ≤ 0.60 | ± 0.05 | ± 0.07 | ± 0.08 | ± 0.040 | ± 0.050 | ± 0.060 |
| > 0.60 | ≤ 0.80 | ± 0.06 | ± 0.08 | ± 0.10 | ± 0.050 | ± 0.060 | ± 0.070 |
| > 0.80 | ≤ 1.00 | ± 0.08 | ± 0.10 | ± 0.11 | ± 0.060 | ± 0.070 | ± 0.080 |
| > 1.00 | ≤ 1.20 | ± 0.10 | ± 0.11 | ± 0.13 | ± 0.070 | ± 0.080 | ± 0.100 |
| > 1.20 | ≤ 1.60 | ± 0.13 | ± 0.14 | ± 0.16 | ± 0.080 | ± 0.100 | ± 0.110 |
| > 1.60 | ≤ 2.00 | ± 0.16 | ± 0.17 | ± 0.19 | ± 0.100 | ± 0.110 | ± 0.130 |
| > 2.00 | ≤ 2.50 | ± 0.19 | ± 0.20 | ± 0.22 | ± 0.130 | ± 0.140 | ± 0.160 |
| > 2.50 | ≤ 3.00 | ± 0.22 | ± 0.23 | ± 0.24 | ± 0.160 | ± 0.170 | ± 0.180 |
1. Around cold-rolled welds - the pickling welds - an increase of 20% at the most over the thickness
is allowed over a length of 15 metres.
2. For special tolerances, not all combinations of thickness and width are available in every product.
Please contact us for more details.
Tolerances on width
Tolerance | Availability |
|---|---|
| Normal width tolerances | Available |
| Special width tolerances | Refer (± 0.50 mm available on 750 - 2000 mm width) |
Nominal width w | Normal tolerances | Special tolerances (S) | ||
|---|---|---|---|---|
| Under | Over | Under | Over |
| w ≤ 1200 | 0 | 4 | 0 | 2 |
| 1200 < w ≤ 1500 | 0 | 5 | 0 | 2 |
| w > 1500 | 0 | 6 | 0 | 3 |
Out-of-squareness (products supplied as cut sheets only)
The deviation does not exceed 1% of the actual width of the sheet according to the EN 10131: 2006 standard. The deviation from the edge camber does not exceed 5 mm for a length of 2 metres as specified in EN 10131: 2006.
Flatness (products supplied as skin-passed cut sheets only)
Flatness complies with EN 10131: 2006
If there is a dispute about the flatness of material that was ordered to the special tolerances shown in table 8 of EN 10131:2006, then the minimum acceptable standards of flatness described below must be verified.
Criteria in case of disputes over special (FS) flatness tolerances (ReL < 260 N/mm2)
Dimensions in mm.
Nominal width | Edge-wave length | Maximum acceptable wave height |
|---|---|---|
| < 1500 | > 200 | < 1% of edge-wave length |
| ≥ 1500 | > 200 | < 1.5% of edge-wave length |
| – | < 200 | 2 mm |
Winding
For winding, there may be a maximum width gap of 3mm between two consecutive windings. The total width stagger across the coil wall will not exceed 10 mm.
Dimensions and coil weights
Tata Steel can supply cold-rolled steel with the following minimum and maximum dimensions and coil weights.
| Description | Availability |
|---|---|
| Coil diameter inner | 610 mm |
| (508 mm available on request) | |
| Coil diameter outer | 10/7 x width max. |
| 1000 mm min. | |
| 2800 mm max. | |
| Coil weight | 30 t max. |
| 30 - 45 t max. available after consultation | |
| Coil weight limited by maximum outer diameter | |
| Maximum weight allowed by road/rail transport | |
| Some products may have different coil weight ranges available | |
| Usually a minimum coil weight up to 85% of the maximum coil weight can be requested | |
| KIM: width ≤ 1200 mm | 11.9 - 21.5 kg/mm width |
| KIM: 1200mm < width ≤ 1700 mm | 11.9 - 21 kg/mm width |
| KIM: width > 1700 mm | 10.3 kg/mm width and 11.9 - 21 kg/mm width |
| Minimum tonnage per order | Refer to price list for order quantity details |
| Minimum order quantities may apply |
Coil welds
For batch-annealed coils, in general, pickling line welds are included. The number of permissible recoiling line welds is determined in consultation with the customer. If welds are permitted, Tata Steel is better able to implement the best coil weight. A recoiling line weld is marked with a single hole in the centre of the strip, close to the weld. On request the identifying hole can be left out. You can find details on how to get in touch with us in 'Contact Us' below.
EN-EngineeringAutomotive-Product-Cold-rolled-All grades Further processingTSE
Further processing
We have a broad network of Tata Steel service centres across Europe, offering decoiling and slitting services from stock and against short lead times
Light gauge processing
| Processing type | Slitting | Decoiling | Blanking |
|---|---|---|---|
| Thickness range (mm) | 0.2 - 7.0 | 0.3 - 6.0 | 0.3 - 6.0 |
| Width range (mm) | 10 - 2050 | 50 - 2600 | 200 - 2600 |
| Length range | - | up to 6 m | up to 6 m |
| Locations | Netherlands Germany France Spain Sweden Norway Finland |
Netherlands Germany France Spain Sweden Norway Finland |
Netherlands |
For further information please visit our Service Centre webpages.


