EN-Engineering-Product-Hot-Rolled-HSS-Ympress Laser grades OverviewTSN
Our high-strength steel grades have been developed to meet a wide variety of applications. The consistent quality of these steels means they can be relied on to deliver benefits for your end-products and processes.
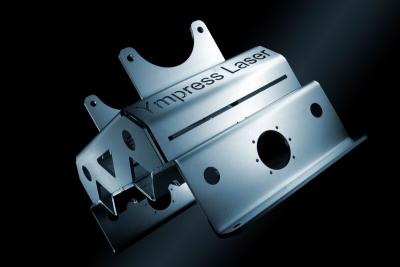
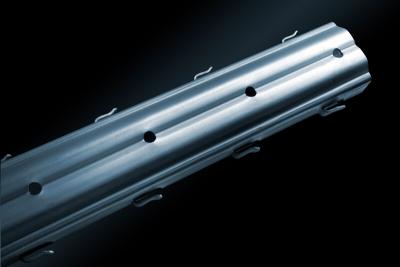
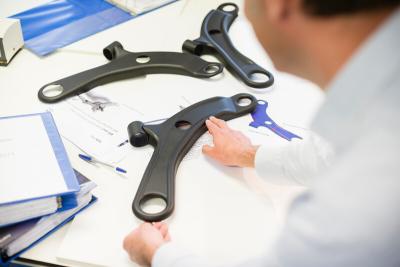
The consistent quality of Ympress Laser products ensures fast, reliable automated processing. A well-adhered oxide layer and consistent chemical contents deliver a clean-cut edge – even at high cutting speeds. This allows simple release of cut parts and reduces post-cut work. Suitable also for conventional cutting methods, Ympress Laser comes will all the advantages of the Ympress product family. To protect the integrity of this product, Ympress Laser is available only through a dedicated supply route. A full customers support package is available.
Applications
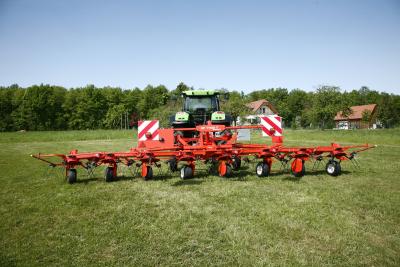
- Agricultural machinery
- Automotive components
- Containers
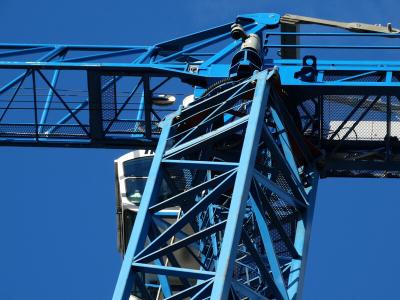
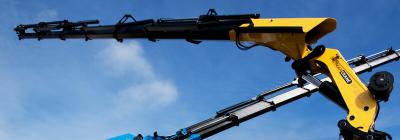
- Cranes and crane booms
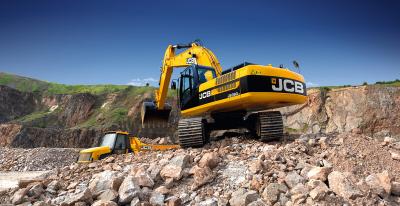
- Earth-moving equipment
- Lightweight towers
- Radiator components
- Safety-critical applications
- Racking and shelving
- Telescopic booms
- Tow hooks
- Train carriages
Relationship with standards
Ympress Laser grades comply with the following standards:
|
Tata Steel |
Thickness |
Corresponding designations |
||
|---|---|---|---|---|
|
Grade |
(mm) |
EN 10025-2: 2004 |
EN 10149-2: 2013 |
Germany SEW 092 |
|
Ympress Laser E250C+N (J2) |
1.5 - 12.7 |
S235J2C+N |
- |
- |
|
Ympress Laser E250C+N (J0) |
12.7 - 20.0 |
S235J0C+N |
- |
- |
|
Ympress Laser E250C |
1.5 - 20.0 |
S235JRC+AR |
- |
- |
|
Ympress Laser S355MC |
All |
- |
S355MC |
QStE380TM |
|
Ympress Laser S420MC |
All |
- |
S420MC |
QStE460TM |
Supply - product conditions
Hot-rolled steel can be supplied with these product conditions and finishes and with this surface treatment:
|
Side/surface condition |
non-pickled |
pickled |
pickled and oiled |
|---|---|---|---|
|
Mill edges |
Yes |
Yes |
Yes |
|
Trimmed edges |
- |
Yes |
Yes |
Trimmed edges available in thicknesses up to 6.35mm. The steel grades shown on the following pages belong to the standard range offered by Tata Steel.
Please contact us regarding other specifications we may have that meet your needs.
Surface aspects
|
Description |
Availability |
|---|---|
|
Surface finish |
Coils are available in non-pickled and pickled finish |
|
Oiling |
Pickled finish is available with rolling or preservative oil applied |
|
|
Oil weight normally 0.5-2.5 g/m2 |
Alternative oiling ranges are available – please contact us for details.
EN-EngineeringAutomotive-Product-Hot-rolled-All Grades Surface aspects Supply Conditions TSE
Supply - product conditions
Hot-rolled steel can be supplied with these product conditions and finishes and with this surface treatment:
| Side/surface condition | non-pickled |
|---|---|
| Mill edges | Yes |
| Trimmed edges | - |
Trimmed edges available in thicknesses up to 8.0 mm. The steel grades shown on the following pages belong to the standard range offered by Tata Steel.
Please contact us regarding other specifications we may have that meet your needs.
Surface aspects
| Description | Availability |
|---|---|
| Surface finish | Coils are available in non-pickled and pickled finish |
| Oiling | Pickled finish is available with rolling or preservative oil applied. Oil weight normally 0.5-2.5 g/m2 |
Alternative oiling ranges are available.
Please contact us for details.
EN-Engineering-Product-Hot-Rolled-HSS-Ympress Laser S420MC-Properties TSN
Mechanical Properties
Steel supplied will comply with the mechanical property limits below.
The values of the tensile test apply to test bars parallel to the rolling direction.
The values of the bend test apply to test bars transverse to the rolling direction.
| Grade | Ympress Laser S420MC | |
|---|---|---|
| Min. Yield strength ReH1 | N/mm² | 420 |
| Tensile strength Rm | N/mm² | 500 - 600 |
| Min. elongation after fracture A% | t < 3 | 18 |
| 3 ≤ t < 5 | 22 | |
| t ≥ 5 | 21 | |
| Min. bend test diameter | t < 5 | 0 t |
| t ≥ 5 | 0 t |
1. Upper yield strength or 0.2% proof stress applies.
t – material thickness in mm.
Elongation test piece length L0 = 80 mm for t < 3 mm. L0 = 5.65√S0 for t ≥ 3 mm.
Impact strength
Impact tests can be performed for thicknesses ≥ 6.0 mm. Please contact us for details.
Chemical composition
Steel supplied will comply with the chemical limits below
| Grade | Ympress Laser S420MC | |
|---|---|---|
| C | Max. | 0.10 |
| Mn | Max. | 1.50 |
| P | Max. | 0.020 |
| S | Max. | 0.005 |
| Si | Max. | 0.03 |
| Altot | Min. | 0.015 |
| Nb | Max. 1 | 0.08 |
| V | Max. 1 | - |
| Ti | Max. 1 | 0.05 |
| Mo | Max. | - |
| Cu | Max. | - |
1. The sum of Nb, V and Ti shall be max. 0.22%.
All values are in weight%
EN-Engineering-Product-Hot-Rolled-HSS-Ympress Laser S420MC-Dimensions TSN
Dimensional capability - non-pickled
Dimensions in mm. These dimensions are applicable to both the Ympress and the EN equivalent grades unless noted otherwise.
| Thickness | Max. width |
|---|---|
| Ympress Laser | |
| From - up to | S420MC |
| 1.57 - 1.60 | 1000 |
| 1.60 - 1.70 | 1040 |
| 1.70 - 1.80 | 1150 |
| 1.80 - 1.90 | 1230 |
| 1.90 - 2.00 | 1300 |
| 2.00 - 2.20 | 1380 |
| 2.20 - 2.40 | 1500 |
| 2.40 - 2.60 | 1630 |
| 2.60 - 2.70 | 1680 |
| 2.70 - 2.80 | 1710 |
| 2.80 - 3.00 | 1750 |
| 3.00 - 3.20 | 1790 |
| 3.20 - 3.50 | 1840 |
| 3.50 - 3.65 | 1880 |
| 3.65 - 4.00 | 1920 |
| 4.00 - 4.40 | 1990 |
| 4.40 - 15.00 | 2070 |
The minimum width is 1000 mm. Please consult with us for other dimensions, including dimensions up to 20 mm thickness.
Dimensional capability - pickled
Dimensions in mm. These dimensions are applicable to both the Ympress and the EN equivalent grades unless noted otherwise.
| Thickness | Max. width |
|---|---|
| Ympress Laser | |
| From - up to | S420MC |
| 1.57 - 1.60 | 1000 |
| 1.60 - 1.70 | 1040 |
| 1.70 - 1.80 | 1150 |
| 1.80 - 1.90 | 1230 |
| 1.90 - 2.00 | 1300 |
| 2.00 - 2.20 | 1380 |
| 2.20 - 2.40 | 1500 |
| 2.40 - 2.60 | 1630 |
| 2.60 - 2.80 | 1710 |
| 2.80 - 3.00 | 1750 |
| 3.00 - 3.20 | 1790 |
| 3.20 - 3.47 | 1840 |
| 3.47 - 3.65 | 1880 |
| 3.65 - 4.00 | 1920 |
| 4.00 - 4.40 | 2000 |
| 4.40 - 8.10 | 2070 |
| 8.10 -12.10 | 1600 |
The minimum width is 1000 mm.
Widths smaller than 1000 mm and/or thicknesses up to 20 mm may be available - please contact us.
Tolerances
Tolerances for wide strip and slit wide strip comply with standard EN 10051: 2010.
Tighter tolerances are available, please contact us.
EN-EngineeringAutomotive-Product-Hot-rolled-All grades Shape and dimensional tolerances TSE
Shape and dimensional tolerances
The specified values for wide strip do not apply to the uncropped ends of the coil (‘head’ and ‘tail’). The length of these uncropped ends is calculated using the following formula:
length (in metres) = 90/nominal thickness (in mm), with a maximum of 20 metres.
If required, this part of the coil can be removed, however an additional cost may be charged for this.
Tolerances on thickness
Tata Steel can supply to full thickness tolerance specified in EN 10051:2010.
Tighter tolerances are available as shown below:
| Product type | Thickness tolerances available | |||||
|---|---|---|---|---|---|---|
| (% of full EN 10051:2010 tolerance) | ||||||
| 100% | 75% | 66% | 60% | 50% | 33% | |
|
Steel for forming |
Yes |
Yes |
Yes |
Yes |
Yes |
Yes 1 |
|
High-strength low-alloy |
Yes |
Yes |
Yes |
Yes |
Yes |
Yes 1 |
|
Ympress® HSLA |
|
|
|
|
Yes |
Yes 1 |
|
Ympress® Laser |
|
|
|
|
Yes |
Yes 1 |
|
Structural steel |
Yes |
Yes |
Yes |
Yes |
Yes |
Yes 1 |
| Boron manganese steel | Yes | Yes | Yes | Yes | Yes | |
|
Case-hardening steel |
Yes |
Yes |
Yes |
Yes |
Yes |
|
|
High-carbon steel |
Yes |
|
|
|
|
|
|
Dual phase steel |
Yes |
|
|
|
|
|
|
Hot forming steel |
Yes |
|
|
|
|
|
|
Valast® abrasion resistant steel |
Yes |
Yes |
Yes |
Yes |
Yes |
|
|
Steel for pressure vessels |
Yes |
|
|
|
|
|
|
Steel for gas cylinders |
Yes |
|
|
|
|
|
|
Steel for line pipe |
Yes |
|
|
|
|
|
|
Ship plate |
Yes |
|
|
|
|
|
1. Available for certain grades and thicknesses between 3.0 mm and 6.0 mm.
Please contact us on the availability of special tolerances to meet your requirements.
Tolerances on thickness for hot-rolled steel with a low carbon content for cold forming
(DD11-DD14 in EN 10111:2008)
| Nominal thickness | Tolerances for a nominal width of | ||||
|---|---|---|---|---|---|
| ≤ 1200 | > 1200 | > 1500 | > 1800 | ||
| ≤ 1500 | ≤ 1800 | ||||
|
|
≤ 2.00 |
± 0.13 |
± 0.14 |
± 0.16 |
- |
|
> 2.00 |
≤ 2.50 |
± 0.14 |
± 0.16 |
± 0.17 |
± 0.19 |
|
> 2.50 |
≤ 3.00 |
± 0.15 |
± 0.17 |
± 0.18 |
± 0.20 |
|
> 3.00 |
≤ 4.00 |
± 0.17 |
± 0.18 |
± 0.20 |
± 0.20 |
|
> 4.00 |
≤ 5.00 |
± 0.18 |
± 0.20 |
± 0.21 |
± 0.22 |
|
> 5.00 |
≤ 6.00 |
± 0.20 |
± 0.21 |
± 0.22 |
± 0.23 |
|
> 6.00 |
≤ 8.00 |
± 0.22 |
± 0.23 |
± 0.23 |
± 0.26 |
|
> 8.00 |
≤ 11.00 |
± 0.24 |
± 0.25 |
± 0.25 |
± 0.28 |
All dimensions are mm.
Tolerances on thickness of steel grades with a specified minimum yield strength
Re ≤ 300 N/mm2 (category A)
| Nominal thickness | Tolerances for a nominal width of | ||||
|---|---|---|---|---|---|
| ≤ 1200 | > 1200 | > 1500 | > 1800 | ||
| ≤ 1500 | ≤ 1800 | ||||
|
≤ 2.00 |
± 0.17 |
± 0.19 |
± 0.21 |
- |
|
|
> 2.00 |
≤ 2.50 |
± 0.18 |
± 0.21 |
± 0.23 |
± 0.25 |
|
> 2.50 |
≤ 3.00 |
± 0.20 |
± 0.22 |
± 0.24 |
± 0.26 |
|
> 3.00 |
≤ 4.00 |
± 0.22 |
± 0.24 |
± 0.26 |
± 0.27 |
|
> 4.00 |
≤ 5.00 |
± 0.24 |
± 0.26 |
± 0.28 |
± 0.29 |
|
> 5.00 |
≤ 6.00 |
± 0.26 |
± 0.28 |
± 0.29 |
± 0.31 |
|
> 6.00 |
≤ 8.00 |
± 0.29 |
± 0.30 |
± 0.31 |
± 0.35 |
|
> 8.00 |
≤ 10.00 |
± 0.32 |
± 0.33 |
± 0.34 |
± 0.40 |
|
> 10.00 |
≤ 12.50 |
± 0.35 |
± 0.36 |
± 0.37 |
± 0.43 |
|
> 12.50 |
≤ 15.00 |
± 0.37 |
± 0.38 |
± 0.40 |
± 0.46 |
|
> 15.00 |
≤ 25.00 |
± 0.40 |
± 0.42 |
± 0.45 |
± 0.50 |
All dimensions are mm.
Tolerances on thickness of steel grades with a specified minimum yield strength
300 N/mm2 < Re ≤ 360 N/mm2 (category B)
| Nominal thickness | Tolerances for a nominal width of | ||||
|---|---|---|---|---|---|
| ≤ 1200 | > 1200 | > 1500 | > 1800 | ||
| ≤ 1500 | ≤ 1800 | ||||
|
|
≤ 2.00 |
± 0.20 |
± 0.22 |
± 0.24 |
- |
|
> 2.00 |
≤ 2.50 |
± 0.21 |
± 0.24 |
± 0.26 |
± 0.29 |
|
> 2.50 |
≤ 3.00 |
± 0.23 |
± 0.25 |
± 0.28 |
± 0.30 |
|
> 3.00 |
≤ 4.00 |
± 0.25 |
± 0.28 |
± 0.30 |
± 0.31 |
|
> 4.00 |
≤ 5.00 |
± 0.28 |
± 0.30 |
± 0.32 |
± 0.33 |
|
> 5.00 |
≤ 6.00 |
± 0.30 |
± 0.32 |
± 0.33 |
± 0.36 |
|
> 6.00 |
≤ 8.00 |
± 0.33 |
± 0.35 |
± 0.36 |
± 0.40 |
|
> 8.00 |
≤ 10.00 |
± 0.37 |
± 0.38 |
± 0.39 |
± 0.46 |
|
> 10.00 |
≤ 12.50 |
± 0.40 |
± 0.41 |
± 0.43 |
± 0.49 |
|
> 12.50 |
≤ 15.00 |
± 0.43 |
± 0.44 |
± 0.46 |
± 0.53 |
|
> 15.00 |
≤ 25.00 |
± 0.46 |
± 0.48 |
± 0.52 |
± 0.58 |
All dimensions are mm.
Tolerances on thickness of steel grades with a specified minimum yield strength
360 N/mm2 < Re ≤ 420 N/mm2 (category C)
| Nominal thickness |
Tolerances for a nominal width of |
||||
|---|---|---|---|---|---|
| ≤ 1200 | > 1200 | > 1500 | > 1800 | ||
| ≤ 1500 | ≤ 1800 | ||||
|
|
≤ 2.00 |
± 0.22 |
± 0.25 |
± 0.27 |
- |
|
> 2.00 |
≤ 2.50 |
± 0.23 |
± 0.27 |
± 0.30 |
± 0.33 |
|
> 2.50 |
≤ 3.00 |
± 0.26 |
± 0.29 |
± 0.31 |
± 0.34 |
|
> 3.00 |
≤ 4.00 |
± 0.29 |
± 0.31 |
± 0.34 |
± 0.35 |
|
> 4.00 |
≤ 5.00 |
± 0.31 |
± 0.34 |
± 0.36 |
± 0.38 |
|
> 5.00 |
≤ 6.00 |
± 0.34 |
± 0.36 |
± 0.38 |
± 0.40 |
|
> 6.00 |
≤ 8.00 |
± 0.38 |
± 0.39 |
± 0.40 |
± 0.46 |
|
> 8.00 |
≤ 10.00 |
± 0.42 |
± 0.43 |
± 0.44 |
± 0.52 |
|
> 10.00 |
≤ 12.50 |
± 0.46 |
± 0.47 |
± 0.48 |
± 0.56 |
|
> 12.50 |
≤ 15.00 |
± 0.48 |
± 0.49 |
± 0.52 |
± 0.60 |
|
> 15.00 |
≤ 25.00 |
± 0.52 |
± 0.55 |
± 0.59 |
± 0.65 |
All dimensions are mm.
Tolerances on thickness of steel grades with a specified minimum yield strength
420 N/mm2 < Re ≤ 900 N/mm2 (category D)
|
Nominal thickness |
Tolerances for a nominal width of | ||||
|---|---|---|---|---|---|
| ≤ 1200 | > 1200 | > 1500 | > 1800 | ||
| ≤ 1500 | ≤ 1800 | ||||
|
|
≤ 2.00 |
± 0.24 |
± 0.27 |
± 0.29 |
- |
|
> 2.00 |
≤ 2.50 |
± 0.25 |
± 0.29 |
± 0.32 |
± 0.35 |
|
> 2.50 |
≤ 3.00 |
± 0.28 |
± 0.31 |
± 0.34 |
± 0.36 |
|
> 3.00 |
≤ 4.00 |
± 0.31 |
± 0.34 |
± 0.36 |
± 0.38 |
|
> 4.00 |
≤ 5.00 |
± 0.34 |
± 0.36 |
± 0.39 |
± 0.41 |
|
> 5.00 |
≤ 6.00 |
± 0.36 |
± 0.39 |
± 0.41 |
± 0.43 |
|
> 6.00 |
≤ 8.00 |
± 0.41 |
± 0.42 |
± 0.43 |
± 0.49 |
|
> 8.00 |
≤ 10.00 |
± 0.45 |
± 0.46 |
± 0.48 |
± 0.56 |
|
> 10.00 |
≤ 12.50 |
± 0.49 |
± 0.50 |
± 0.52 |
± 0.60 |
|
> 12.50 |
≤ 15.00 |
± 0.52 |
± 0.53 |
± 0.56 |
± 0.64 |
|
> 15.00 |
≤ 25.00 |
± 0.56 |
± 0.59 |
± 0.63 |
± 0.70 |
All dimensions are mm.
Tolerances on width
Tolerances in mm.
| Nominal width w | ||||
|---|---|---|---|---|
| Mill edges | Trimmed edges | |||
| lower | upper | lower | upper | |
|
w ≤ 1200 |
0 |
20 |
0 |
3 |
|
1200 < w ≤ 1850 |
0 |
20 |
0 |
5 |
|
w > 1850 |
0 |
25 |
0 |
6 |
Tolerances in mm for wide strip and slit wide strip
The tolerances for wide strip and slit wide strip comply with standard EN 10051:2010.
The specified values for wide strip do not apply to the uncropped ends of the coil (‘head’ and ‘tail’). The length of these uncropped ends is calculated using the following formula:
length (in metres) = 90/nominal thickness (in mm), with a maximum of 20 metres.
If required, this part of the coil can be removed, however an additional cost may be charged for this.
Edge camber
The deviation from the edge over a length of 5000 mm:
• with mill edges, no more than 20 mm
• with trimmed edges, no more than 15 mm
Flatness
Requirements as regards flatness can be agreed at the time of enquiry.
Option for maximum crown values
The following high crown C40 options available for hot-rolled products.
Crown values on the C20-position as well as minimum crown values on both C20 and C40 position are also available on request.
Maximum Crown C40 in µm values for hot-rolled steel with a low carbon content for cold forming
(DD11-DD14 in EN 10111:2008)
|
Category 1 |
C40 |
||||
|---|---|---|---|---|---|
| Nominal Thickness |
≤ 1200 |
> 1200 |
> 1500 |
> 1800 |
|
|
≤ 1500 |
≤ 1800 |
||||
|
> 1.47 |
≤ 2.00 |
40 |
40 |
40 |
40 |
|
> 2.00 |
≤ 2.50 |
40 |
40 |
50 |
50 |
|
> 2.50 |
≤ 3.00 |
40 |
40 |
50 |
50 |
|
> 3.00 |
≤ 6.00 |
40 |
50 |
50 |
50 |
|
> 6.00 |
≤ 11.00 |
50 |
50 |
50 |
50 |
Maximum Crown C40 in µm values of structural steel grades
(S185-S235-S275 ≤ 10mm in EN 10025-2:2004)
|
Category 2 |
C40 |
||||
|---|---|---|---|---|---|
| Nominal Thickness |
≤ 1200 |
> 1200 |
> 1500 |
> 1800 |
|
|
≤ 1500 |
≤ 1800 |
||||
|
> 1.47 |
≤ 2.00 |
40 |
40 |
40 |
40 |
|
> 2.00 |
≤ 2.50 |
40 |
40 |
50 |
50 |
|
> 2.50 |
≤ 20.00 |
50 |
50 |
50 |
50 |
Maximum Crown C40 in µm values of structural steel grades(S275 > 10mm in EN 10025-2:2004)
and HSLA grades (S315MC in EN 10149-2:1996)
|
Category 3 |
C40 |
||||
|---|---|---|---|---|---|
| Nominal Thickness |
≤ 1200 |
> 1200 |
> 1500 |
> 1800 |
|
|
≤ 1500 |
≤ 1800 |
||||
|
> 1.47 |
≤ 2.00 |
50 |
50 |
60 |
60 |
|
> 2.00 |
≤ 2.50 |
50 |
60 |
60 |
60 |
|
> 2.50 |
≤ 3.00 |
50 |
60 |
60 |
60 |
|
> 3.00 |
≤ 20.00 |
60 |
60 |
70 |
70 |
Maximum Crown C40 in µm values of HSLA grades
(S355MC, S420MC, S460MC, S500MC, S550MC in EN 10149-2:1996)
|
Category 4 |
C40 |
||||
|---|---|---|---|---|---|
| Nominal Thickness |
≤ 1200 |
> 1200 |
> 1500 |
> 1800 |
|
|
≤ 1500 |
≤ 1800 |
||||
|
> 1.47 |
≤ 2.00 |
60 |
70 |
70 |
70 |
|
> 2.00 |
≤ 2.50 |
60 |
70 |
80 |
80 |
|
> 2.50 |
≤ 3.00 |
60 |
70 |
80 |
80 |
|
> 3.00 |
≤ 5.00 |
70 |
70 |
80 |
80 |
|
> 5.00 |
≤ 20.00 |
80 |
80 |
80 |
80 |
Dimensions and coil weights
Tata Steel can supply hot-rolled steels with the following minimum and maximum dimensions and weights:
|
Description |
Availability |
|---|---|
|
Coil diameter inner non-pickled |
762 mm |
|
Coil diameter inner pickled |
610 mm standard |
|
762 mm on request |
|
|
Tolerance on inner diameter |
+0/-50 mm |
|
Coil diameter outer non-pickled |
Outer diameter available is 10/7 x width |
|
to reduce possibility of coil tipping over |
|
|
Max. 2200 mm |
|
|
Min. 1050 mm |
|
|
Coil diameter outer pickled and oiled |
Outer diameter available is 10/7 x width |
|
to reduce possibility of coil tipping over |
|
|
Outer diameter |
|
|
limit 2200 mm |
|
|
Min. 1050 mm |
|
|
Coil weight |
Max. 34 tonnes |
|
Additional maximum limits from transport |
|
|
limits and outer coil diameter |
|
|
Some HR products may have different |
|
|
coil weight ranges |
|
|
KIM: width ≤ 1200 mm |
15.5 - 23.0 kg/mm width |
|
KIM: 1200 < width ≤ 1700 mm |
12.1 - 21.7 kg/mm width |
|
KIM: width > 1700 mm |
11.0 kg/mm width and 12.1 - 21.7 kg/mm width |
|
Minimum tonnage per order |
Please refer to price list for order quantity details |
|
Minimum order quantities may apply |
EN-EngineeringAutomotive-Product-Hot-rolled-Heavy+Light further processing TSE
Further processing
We have a broad network of Tata Steel service centres across Europe, offering decoiling and slitting services from stock and against short lead times.
Heavy gauge processing
| Processing type | Decoiling |
|---|---|
| Thickness range (mm) | 1.4 - 25.4 |
| Width range (mm) | 300 - 2600 |
| Length range | up to 18.4 m |
| Locations | Netherlands |
Light gauge processing
| Processing type | Slitting | Decoiling | Blanking |
|---|---|---|---|
| Thickness range (mm) | 0.2 - 7.0 | 0.3 - 6.0 | 0.3 - 6.0 |
| Width range (mm) | 10 - 2050 | 50 - 2600 | 200 - 2600 |
| Length range | - | up to 6 m | up to 6 m |
| Locations | Netherlands Germany France Spain Sweden Norway Finland |
Netherlands Germany France Spain Sweden Norway Finland |
Netherlands |
For further information please visit our Service Centre webpages.


